Showing posts with label fruit. Show all posts

Sunday, February 8, 2015

Trader Joe's Sale Alert! Hazelnuts! Cara Cara Oranges too.


Hazelnuts

Hazelnuts (aka Filberts) are on sale at Trader Joe's in Boulder this month. One of my favorites. I like them in salads. They are delicious in granola. They are good all by themselves as a snack. They are on sale for $7.99/pound which is a great deal.

They are raw and not peeled, however. No problem! Though sort of messy and tedious, this method really works. Then, for the best flavor, toast them until lightly browned and crunchy. I've also tried toasting them to get the skins off. Doesn't work consistently. Hazelnut skins are bitter so I go for the blanching method.

How to Blanch Hazelnuts:

Bring 1 ½ cups of water to a boil. Add ½ to 1 cup hazelnuts and 2 Tablespoons baking soda. Turn down heat to maintain a steady boil and boil for 3 minutes. When the timer goes off, run a few nuts under cold water and if the skin slips off of all of them, they are done. Otherwise, boil for another minute. Pour the nuts and the now black water into a strainer and run under cool water. Slip the skin off each nut and place in a dry dish towel (one you are willing to sacrifice-it will be permanently stained afterward). Rub to dry the nuts, then toast in a 300°F oven until browned, 15-20 minutes.

After a little rubdown in a paper towel. The skins come right off!


Cara Cara Navel Oranges

Cara Cara oranges are pink on the inside, sweet, and seedless. Winter is citrus season and Cara Cara's are one of the best. According to Trader Joe's, they were first discovered in Venezuela in 1976. A little citrus trivia - many new varieties come from random hybrids. Since citrus (like most tree fruits) is cultivated by grafting rather than seeds, one tree with unusual and delicious qualities can be propagated around the world. Nowadays, Cara Cara's are cultivated in California and Florida. Their flavor is more complex than regular navel oranges - a little spicy. Give them a try. They look beautiful in fruit salads.


Tuesday, October 29, 2013

Apple-Cranberry Crisp


Cranberries are back! As we head quickly towards Thanksgiving, the cranberries arrive in supermarkets across the US. They pack quite a punch - both flavor and color-wise. I love them in traditional cranberry sauce but I think they really shine in desserts because their tartness punches up sweet desserts. And what a color - cranberries turn everything an electric red, naturally.

Cranberries are cheap and plentiful this time of year so I like to stock up. Stick a bag or two in your freezer because they can be hard to find (and expensive) after the holidays are over. They freeze wonderfully.

Here's a dessert in tune with the fall season: apple-cranberry crisp. It's apple season too (to learn more about apples check out this post) so this is a perfect intersection of two great fall season fruits.

Unlike most fruits, cranberries are not sweet at all which is why you need to add a lot of sugar to make them palatable. Still, this isn't a very sweet dessert. There's just enough sugar to take the aggressive tart edge off but not so much that it tastes like cranberry candy. Sugar should complement the fruit, not overwhelm it.

This is great for a party or a holiday dinner. It also keeps nicely in the refrigerator. It's best warm - zap it in the microwave for a minute if it's been in the fridge.

Apple-Cranberry Crisp
(serves 8)

non-stick cooking spray

Fruit Filling
1 12 oz. bag fresh or frozen cranberries
4 large apples, cored and sliced (no need to peel them)
½ cup sugar
1 Tablespoon flour

Crisp
2 Tablespoons brown sugar, packed
3 Tablespoons flour
¾ cup rolled quick or regular oats
½ cup chopped walnuts
3 Tablespoons butter, melted or walnut oil
zest of ½ an orange
1 pinch of salt

Preheat the oven to 375°F. Spray a 9"x9" baking pan with non-stick cooking spray. Set aside.

Rinse the cranberries. (Use warm water if they are frozen or they will freeze together.) Mix the cranberries and apples in a large bowl. Sprinkle on the sugar and flour and mix again to combine. Pour into the prepared pan. In the same bowl, combine all the crisp ingredients. Mix enough to distribute the orange zest; it tends to clump together. Sprinkle the topping evenly over the fruit. Bake for 40 (45 minutes if you started with frozen berries) until crisp is bubbly and topping is golden brown. Let sit for 10 minutes before serving.

Recipe adapted from Jane Brody's Good Food Book, 1985.

Wednesday, July 17, 2013

Easy Summer Breakfast: Cheese and Peach Toast


This time of year, I'm figuring out all sorts of ways to get ripe peaches or nectarines into my cooking. This is an really simple way: pair them with a soft cheese on toast and eat it for breakfast or as a light snack.

I used goat cheese with herbs, but Neufchatel cheese (aka low-fat cream cheese) is tasty too. Toast a couple of slices of bread, smear on a bit of cheese, and top with slices of ripe, juicy peaches. It's a great combination.

Wednesday, July 10, 2013

Making Cooking Easy: Don't think like a Chef

Bananas, December 2006 by photographer Steve Hopson (from WikiCommons).
One of the best bits of advice I can give to people just getting the hang of this cooking thing is "Don't get too ambitious." Chefs create new recipes and wing it a lot. This is skill that most people do not have, certainly not if they are learning to cook. We all need to eat and if cooking stands in the way of eating, you'll get frustrated and seek out that quick, easy, and nutritionally bereft convenience food. That's why I suggest that beginning cooks get a set of basic recipes that they like and make them a lot. Variety may be the spice of life, but trying new recipes all the time is hard work. I have a culinary degree and I try new recipes nearly every day so I have plenty of experience here. You don't know if they will work. You have to constantly check the recipe to see what ingredients you need next, what steps you need to do next. If you have a limited number of go-to recipes that you know like the back of your hand, you can almost execute them in your sleep. This makes getting a meal on the table so much easier.

Don't be seduced by the gazillion recipes out there. Sure, try a new one when you have the leisure to do it. It will take a little while to build a repertoire of recipes (and you'll be building your cooking skills at the same time). But once you have that list of standards, for most of your meals, stick to the tried and true. For lots of folks, the familiar makes them feel good, which means that cooking the same thing a bunch of times is a source of security. Or just plain easy.

I don't happen to be one of those people. And, that's why I keep trying new recipes. New recipes that you know will work for you, the first time and every other time you try them. Keep checking back here. I'll keep giving you new ones, if you need a change in your routine.

Here's a recipe I have made a bunch of times because it is one hearty loaf of banana bread. It's a whole grain version. You'll need to find whole wheat pastry flour, which makes it lighter than all regular whole wheat flour. You can often find it in the bulk aisle of supermarkets (bulk is very economical) and in stores that specialize in natural foods like Whole Foods and Sprouts. Bob's Red Mill produces a huge array of flours including a whole wheat pastry flour and Bob's Red Mill products are available nationally.

Unlike a lot of banana bread recipes, this one uses a lot of bananas. They need to be ripe or even overripe (the skin is all brown). You can buy a bunch especially for making this bread, or you can stash overripe bananas in a bag in your freezer and make it when you collect six of them. Thaw frozen bananas before beginning.

Banana Bread
(serves 10)

⅓ cup honey
2 Tablespoons vegetable oil
1 teaspoon vanilla
½ teaspoon salt
2 cups mashed ripe bananas (about 6)
2 Tablespoons fresh lemon juice
1 ½ cups whole wheat pastry flour
1 ½ cups regular whole wheat flour
2 teaspoons baking powder (1 ½ teaspoons if at Boulder altitude)
½ teaspoon baking soda
½ cup chopped dried apricots (see Note)
½ cup toasted chopped nuts (I like pecans but walnuts or almonds are good too)

Preheat oven to 350°F. Grease a 8"x4" loaf pan.

Beat together the honey, vegetable oil, and vanilla in a large bowl. Mix in the bananas and lemon juice. Sift together the flours, baking powder, baking soda, and salt into a medium bowl. Mix the dry ingredients into the bananas, only mixing enough to moisten all the flour. Gently mix in the apricots and nuts. Pour the batter into the loaf pan. Bake for at least an hour, up to an hour and a half, until a toothpick comes out clean. Because this bread bakes so long and the bananas have a lot of sugar, it can over-brown. If the top is getting very dark, reduce the oven to 325°F for the rest of baking.

Allow to cool completely before trying to slice it.

Note: Dried apricots are very sticky when warm which makes them hard to chop. They won't stick to your knife if you put them in the freezer for 30 minutes before trying to chop them.

Monday, July 1, 2013

Meatless Monday: Apricot Baked Tofu


This one is really easy. It's better if you plan ahead and freeze the tofu. That improves the texture of the tofu a lot by getting rid of more water. You can skip the freezing and just press slices of tofu between layers of toweling to remove some of the water, but it's worth it to think ahead a little and freeze it.

The flavor is a little tart, and a little sweet. The fruit is delicious with the tofu, and the mayo adds richness.

Apricot Baked Tofu
(serves 4, costs $3.60)

14-16 oz. firm tofu
4 Tablespoon mayonnaise (regular or low-fat)
2 Tablespoon ketchup
¼ teaspoon garlic powder
1 teaspoon vinegar (white, cider vinegar, or rice)
½ teaspoon salt or seasoned salt
¼ teaspoon black pepper
3 Tablespoon apricot or peach jam or preserves
non-stick cooking spray
1 peach or nectarine, sliced into 12 slices or ½ mango, sliced

Slice the tofu into 6 slices, each about ¾" thick. Place on a small cookie sheet and freeze. It takes about 2 hours to freeze, but you can freeze it overnight if that is more convenient. Remove from the freezer and allow to thaw about 30 minutes. Lay 3 layers of paper towels on a rack, place the tofu on top, and cover with another 3 layers of paper towels. Cover with a plate and put something heavy like a bag of flour or a big can of tomatoes on the plate. Place the whole thing in the sink or on a plate to let the water drip off. Let sit for 20-30 minutes.

Preheat the oven to 350°F. In a small bowl, mix together the mayonnaise, ketchup, garlic powder, vinegar, salt, pepper, and apricot preserves.

Spray a small cookie sheet (you can use the one you froze the tofu on; just wipe it dry) with non-stick cooking spray. Place the tofu slices in one layer and very close together on the cookie sheet. Spread ¾ of the mayo mixture on top. Spread the fruit slices on top in one layer. Spread on the rest of the mayo mixture. Bake, uncovered, for 45 minutes until hot and bubbly. Serve over rice.

Monday, June 3, 2013

Meatless Monday: Curried Quinoa Salad


Quinoa, this year's superfood! I don't go in for this superfood stuff, but it is pretty special. It is higher in protein than any other grain and that protein is complete, meaning it contains all the essential amino acids. In a varied diet, this isn't quite as important as it sounds. (For more on protein, see this post.) If you are sensitive to gluten, it contains none. And, you can say you are eating the ancient grain of the Inca. Imagine you are at Machu Pichu. :-)

Quinoa has soap-like chemicals in its seed coat so it is important to rinse it well, swishing it around a bit in water, before cooking. Otherwise, it may taste a bit soapy and bitter. Generally, the flavor is pretty bland, making it a good choice for a salad because it readily soaks up the flavors of the dressing.

Quinoa is quite a bit more expensive than more common grains. I've seen it in the bulk section for $3.99/pound which is more than double the price of rice, even fancy rice like Jasmine. It does expand a lot (4 times its dry volume), bringing the cost way down. Compared to many forms of meat, poultry, or fish, it's quite economical.

Curried Quinoa Salad
(serves 2)

Quinoa
2 cups water or vegetable stock
½ teaspoon salt (omit if using salted vegetable stock)
1 cup quinoa, rinsed well and drained

Dressing
¼ cup vegetable oil
2 Tablespoons white wine vinegar or white balsamic vinegar
1 Tablespoon mango chutney, chopped if very chunky (see Notes)
1 ½ teaspoons mild or medium curry powder
¼ teaspoon dry mustard
1 big pinch of salt and pepper

Salad
1 cup mango or cantaloupe, peeled and diced (can use thawed frozen mango too)
1 cup peeled cucumber, seeds scooped out with a spoon and diced
2 green onions
2 cups baby spinach, packed
2 Tablespoons sliced almonds, toasted (see Notes)

Bring water or stock and salt to a boil in a medium saucepan. Add quinoa, reduce heat to medium-low, and cook until liquid is absorbed and quinoa is tender, 12-20 minutes (definitely takes closer to 20 at altitude). Transfer to a medium bowl.

Mince the white part of the green onions and slice the green part. Whisk together oil, vinegar, chutney, curry powder, dry mustard, salt, and pepper. Mix in white part of green onions. Pour ¼ cup over quinoa. Add in mango, cucumber, and sliced green onions. Toss. Divide the spinach on 2 plates. Mound quinoa on spinach. Drizzle with remaining dressing and sprinkle 1 Tablespoon of almonds on each place.

Notes:
Mango chutney lasts a very long time in the refrigerator. It's good mixed in rice or alongside Indian bean dals, or as a spread on sandwiches. Very tasty with cheese.

To toast almonds, place in a skillet over medium heat until just golden brown. Watch carefully! They burn quickly.

Adapted from Bon Appetit Fast Easy Fresh Cookbook by Barbara Fairchild.

Tuesday, February 12, 2013

Sort of Tiramisu


Getting ready to teach another class for the college students at CU. Since we are two days from Valentine's Day, it's a date night theme. To get you excited, we are posting dessert first. :-)

Though we have titled this Tiramisu, we know our Italian friends would not approve. Which is why it's called "Sort-Of" Tiramisu. Some of the elements are there but to simplify it, we have cut out the foamy egg custard (called zabaglione in Italian) because that's not exactly a basic technique. There are lots of other differences. But, it still tastes pretty good if you don't expect it to taste like classic Tiramisu. Because it's only "sort-of" a Tiramisu.


Sort of Tiramisu
(serves 6-8, cost $6.75*)

½ cup Cold Espresso, or very strong coffee

6 Tablespoons Sugar, divided
1 package Soft Ladyfingers, 3 ounces
4 ounces Mascarpone Cheese

½ cup Heavy Cream
2 cups Sliced Strawberries, about ½ pound
¼ cup Semisweet Or Bittersweet Chocolate Chips, mini or regular size


Combine espresso with 3 Tbl sugar. Place ½ the ladyfingers into an 8x8" baking pan in one layer. There will gaps. Pour 4 Tbl of the coffee/sugar mixture over the ladyfingers.

Beat mascarpone cheese with remaining 3 Tbl sugar. Add heavy cream and beat until thick and holding a soft peak. Spread ½ of this on top of ladyfingers. Spread 1 cup of strawberries in one layer on top of cream. Place remaining ladyfingers on top of strawberries in one layer. With a teaspoon spoon remaining coffee-sugar mixture over ladyfingers. Spread on the rest of the cheese mixture. Cover with remaining strawberries. Sprinkle chocolate chips into gaps around strawberries.

Serve immediately or chill until ready to serve.

*Usually, mascarpone cheese comes in 8 ounce packages and it's not exactly cheap, so this recipe will cost you $8.75. You aren't likely to use this ingredient in anything else. We suggest you just make this recipe twice and share it with your friends. Or anyone you want to be your friend. :-)

Saturday, October 20, 2012

Green Beans with Pineapple


Does that sound like a strange combination? It works rather well in this very simple Asian side dish. It's an unusual way to get your fruit!

You can make this with fresh green beans (see our post on cooking fresh green beans) but it works nearly as well with frozen green beans. Frozen green beans aren't quite as good as fresh ones, but what they lack in texture and sweetness, they make up for in convenience. No cleaning, no cutting.

You can cook frozen beans in the microwave or on the stove-top. Takes under 15 minutes either way. To cook in the microwave, put beans in a 2 quart microwavable dish with a cover. Add ¼ cup water. Cover and microwave on high for 4 minutes, give them a stir, and cook for another 4 minutes. Let stand, covered, for a couple of minutes. To cook on the stove-top, bring ¼ cup water to a boil in a 2 quart saucepan. Add beans, cover, and cook for 8 minutes. In either case, drain them well before proceeding with the recipe.

Nutritionally speaking, they are equivalent. Frozen beans are quite inexpensive. Fresh beans in season are close, but the frozen ones are consistently cheaper.

How about canned green beans? Their texture is mushy and their flavor is over-cooked. Stick to fresh or frozen.

Green Beans with Pineapple
(serves 4, costs $2)

12 ounces cooked green beans, either fresh or frozen, well-drained
2 Tablespoons butter
1 clove garlic, minced (optional)
1 8-ounce can diced or crushed pineapple, drained
1 Tablespoon soy sauce
A pinch of salt

Melt butter in a skillet over medium heat. Add garlic, if using, and saute for about a minute. Add green beans and stir to cover with butter. Add pineapple and soy sauce. Cook another minute to heat up the Add a pinch of salt if you think it isn't salty enough.

Thursday, August 9, 2012

What's in season now?

Garden tomatoes (photo courtesy of Diane Fritz)

Jamie Oliver just posted an article about what's in season now. He lists peppers, peaches, cucumber, tomatillos, raspberries, and celery. I have a few more suggestions below, but no matter where you are, this is certainly a great time to pick up fresh produce. My local farmer's market is just busting out with beautiful produce. So is my garden. Even your local supermarket will benefit from the abundance of fresh produce. There is such a surplus that prices drop on all manner of delicious fresh fruits and veggies.

For instance, in Colorado where we live, there is a bumper crop of both peaches and cantaloupes this time of year. This is a very, very good year for peaches. Right now, peaches from the west side of Colorado where nearly all our local fruit comes from, are on sale for 99¢ per pound. It's definitely time to buy some peaches. Large cantaloupes are $1.25 a piece. Cantaloupes and peaches are both great in salsas. See our post on making fruit salsas if you need a basic recipe.

Warm season vegetables - eggplants, tomatoes, peppers, cucumbers, corn - are all inexpensive and beautiful right now. You can try out Jamie's Evolution Salad with the tomatoes or our recent recipe for a Cucumber-Yogurt Salad for the cucumber . Or for something kind of different with cucumber, try this stir-fry.

The grapes must be ready in California because the prices here have dropped like a rock. Seedless red and green grapes are on sale for as low as 99¢ a pound this week. Grapes are great to eat out of hand, providing a sweet snack that is much healthier than any candy. For a twist, freeze them and eat them right out of the freezer - a delicious treat on a hot day. Berries are also wonderful this way and if you want to fancy those frozen berries up, check out our recipe below.

We need to gobble up the great produce this time of year because it doesn't last*. Come winter, prices rise and quality drops. Get the good stuff while you can. Enjoy all that summer-time goodness and realize that, like warm summer evenings and baseball, it has its season.

*If you have the space and energy, much of the great produce can be preserved for the middle of winter but that's a whole other post!

Frozen Berries with White Hot Chocolate Sauce
Serves 2

2 oz. white chocolate
2 Tablespoons heavy cream
¼ teaspoon vanilla
1 cup frozen berries

Combine the chocolate, heavy cream, and vanilla in a heat-proof bowl and either microwave it on medium, 1 minute at a time, or set it over a pan of simmering water until the chocolate melts. About 5 minutes before serving, remove the berries from the freezer and place them on individual serving plates. Ladle the warm chocolate sauce over the berries and serve.

Note: You can either buy frozen berries, or freeze your own by placing berries on a flat tray or plate in one layer. When the berries are fully frozen, keep them in a plastic bag in the freezer. Larger berries, such as strawberries, do not freeze well.

Thursday, July 19, 2012

Grilling Peaches


It's peach season in Colorado (really! they grow peaches in Colorado) and grilling them is one of my favorite ways to dress them up. This is simple, delicious cooking at its finest.

First, you macerate (like marinate but that's the term used for fruits) the peaches in something tasty for about an hour. Then you grill them. They don't need much grilling - a few minutes per side. I like to serve them in summer main dish salads. Particularly tasty with a bit of goat cheese. They are also good on yogurt as a light dessert. Or, for a more decadent dessert, serve on ice cream.

Grilled Peaches
(serves 4-6)

3 peaches, washed and cut into halves or quarters
1 Tablespoon fresh lime juice
1 Tablespoon honey
1 Tablespoon chopped fresh basil (see note)

Mix the lime juice, honey, and basil in a medium bowl. Add peaches and stir gently to coat them. Let sit at room temperature for about 1 hour. Grill on a hot, lightly oiled grill for 3 minutes per side until you get some grill marks. The sugar in a peaches and the honey will help them brown up quickly. Serve hot or cold.

Note: Basil is particularly good with peaches but most herbs complement this tasty fruit. Try mint, thyme, rosemary, or tarragon instead of basil.

Tuesday, May 1, 2012

How to Make a Fruit Salsa


I fell in love with fruit salsa while working at a Southwestern restaurant. Salsas were a big part of the garnish for grilled foods, like fish or chicken. It's a great way to boost flavor in a simple dish. It's also a fun way to get fruit into your diet. We didn't have a recipe most of the time, but the method was always similar.

Here's the basic recipe:
  • diced fruit, 
  • some crunch (like red onions or diced sweet peppers or both), 
  • something tart like lime juice,
  • a bit of heat from chiles,
  • some chopped fresh or frozen herbs,
  • and salt to bring it all together.

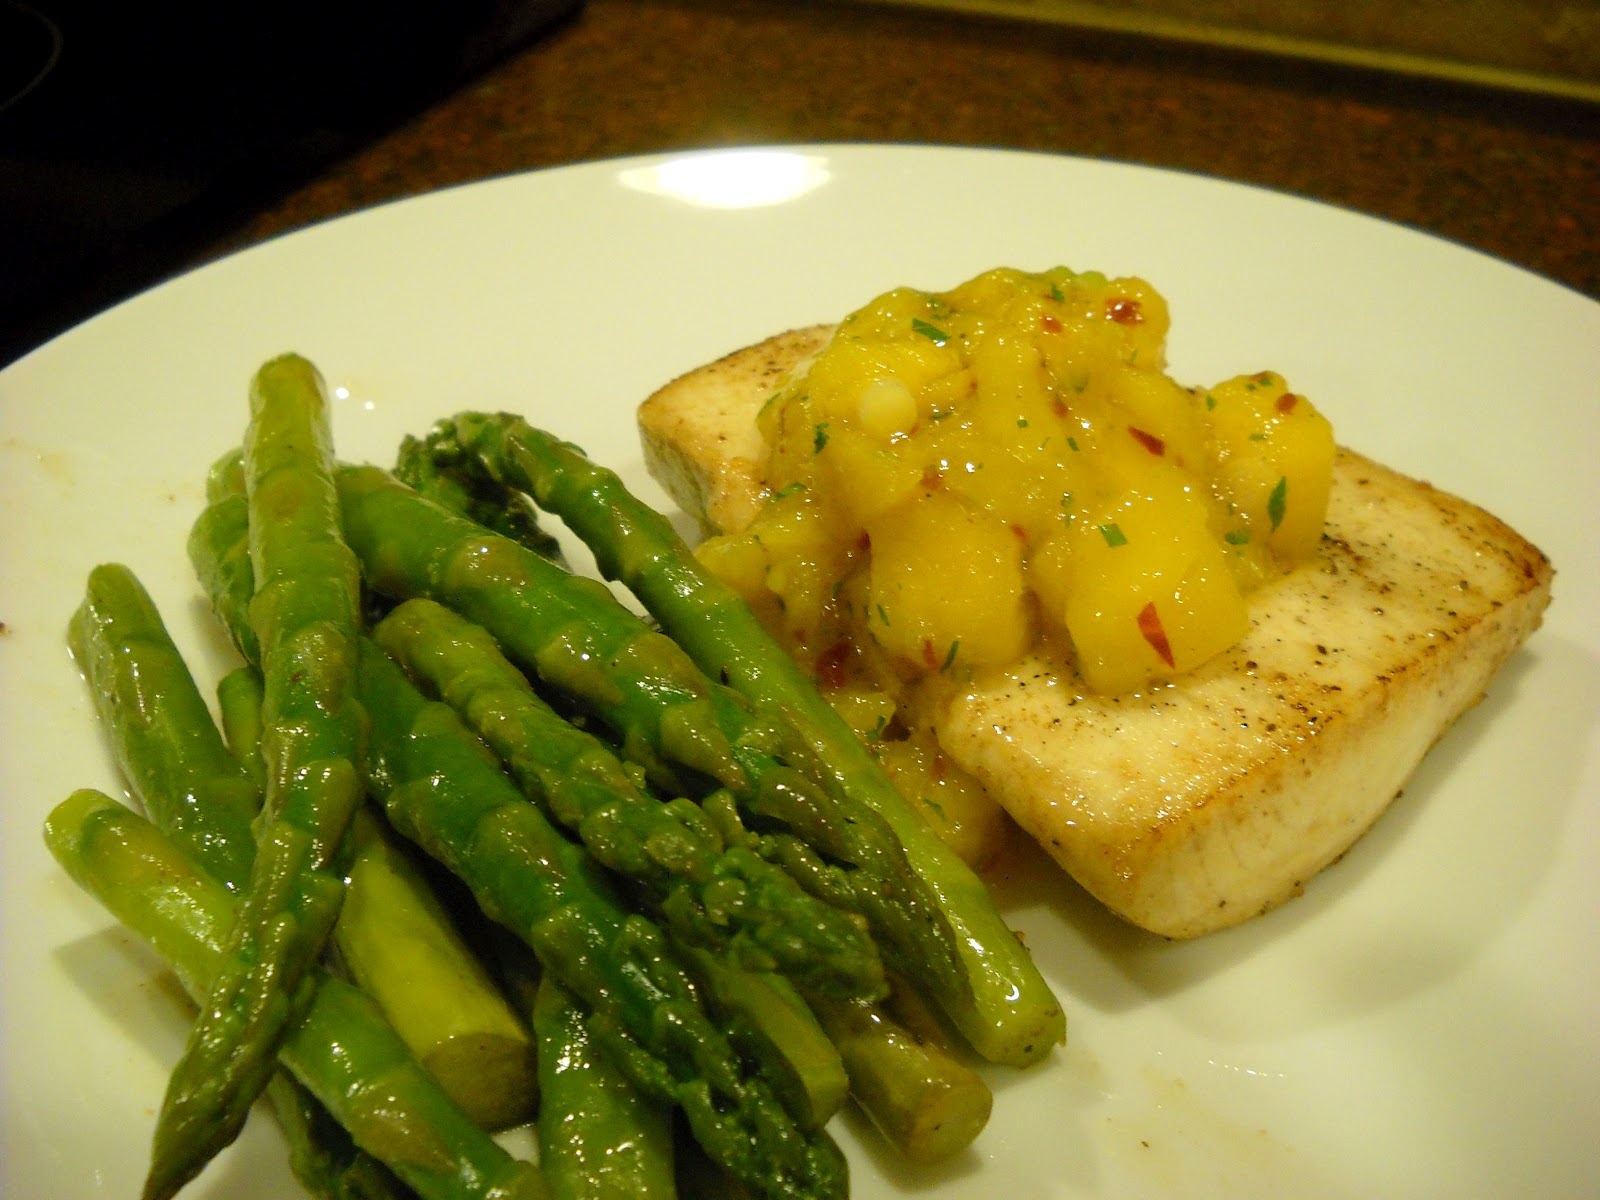
The "recipe" is very flexible and it's a good way to use up fruit. Just about any fruit will do. The salsa in the picture is mango, but melons, pineapple, berries, grapes, peaches are wonderful too. For the tart part, lemon and lime juice are good, as are fruity vinegars like raspberry vinegar or balsamic (particularly good with strawberries). The chiles add some punch and you can pick the level of heat you like. Leave them out if you don't like spicy. Use jalapenos for a little, serranos or chipotles for a bit more, and habarnero for hot, hot, hot! Habarneros are wicked hot - be very careful handling them - but they go especially well with fruit because of their own fruity notes. I used chipotle in adobo because that was all I had. No fresh chiles in the house! For herbs, mint, basil, parsley, cilantro and chives are all possibilities. Mint and basil work in almost any fruit salsa. For something really exotic, use lemon thyme or Thai basil.

To get you started, here's the recipe for the mango salsa. Great on grilled chicken breasts or fish fillets.

Mango Salsa
(makes about 1 1/2 cups, total cost is $1.50)

1 mango, peeled and diced (see Notes)
1 scallion, sliced thinly
2 teaspoons fresh lime juice
1 teaspoon chopped chipotle chile in adobo (see Notes)
4 leaves of mint, chopped fine
1 large pinch of salt
1 small pinch of black pepper

Combine everything in a bowl. Serve immediately though it usually tastes better if it sits in the fridge for about 30 minutes.

Notes:
Mangoes can be tricky to cut up. Check out this video from the Mango Board on how to do it right.
Chipotle chiles in adobo are smoked dried red jalapenos that are packed in a vinegary tomato sauce. They come in small cans. They are hotter than most green jalapenos.

Thursday, April 12, 2012

Thai Fried Rice


This is Ronnie's favorite fried rice recipe, maybe one of her favorite recipes ever! And for good reason. It's easy, quick, and delicious. I hadn't realized how popular Indian-style curry powder was in Thai cooking until I went looking for Thai tea (more on this in an upcoming post). Thai curry powder, which is very close to Indian curry powder, is sold in large containers so Thai cooks must use it up pretty quickly. Who knew?

Fried rice, whether Thai or Chinese, is always better made with cold cooked rice. Freshly cooked rice is too sticky. You can make the rice before making the fried rice but we strongly recommend you spread it out of the pot onto a baking sheet and chill it for 30 minutes. If you happen to have leftover rice from some recent Asian take-out meal, that's the easiest start to this dish. You'll need 3 cups of cooked rice instead of the 1 cup of raw rice called for in the recipe.

We used the optional brown gravy sauce to make the fried rice above. This is only a coloring agent. Given the bright yellow from the curry powder, this is definitely not essential to the dish, so feel free to leave it out (and we didn't include it in the cost of the dish either).

This dish is very adaptable to whatever cooked protein you have: chicken, pork, shrimp, tofu, ham. All are great here. Or add nothing - it's still delicious. The cashews, pineapple, and curry really make this dish special. If you start with cooked rice, it takes no time at all.

Thai Fried Rice
(serves 2-4 generously; total cost w/o optional meat is $2.80, with chicken the cost is $4.60)

1 cup long grain rice
2 cups cold water
2 Tablespoons oil
½ medium onion, chopped
2-3 teaspoons curry powder
2 teaspoons brown gravy sauce (optional)
2 cups cooked chicken or pork, cut into cubes (optional)
1 cup fresh pineapple, cut into small chunks
¼ cup roasted cashews, chopped
½ cup frozen peas
2 Tablespoons soy sauce

Place the rice and cold water in a 3 quart pot. Cover the pot and bring to a boil, then turn the heat to low and tilt the cover to allow some steam to come out of the pot. Cook for 20 minutes, turn off the heat and place the cover back on the pot. Let it sit for 5 minutes. The rice is best used cold, so make it ahead of time and refrigerate it, or spread it out on a baking sheet to cool.

In a large sauté or frying pan, place oil on medium-high heat. Cook onions in oil until they are soft and golden brown in color. Add curry powder and chicken or pork (if using) and stir until meat is heated. Add brown gravy sauce (if using). Add pineapple, cashews and peas and stir until heated through. Add rice and stir until incorporated with other ingredients. Stir in soy sauce.

Tuesday, November 22, 2011

Curry: tasty solution for turkey leftovers


Thanksgiving means turkey, and if you are lucky, you will find yourself with a bumper crop of leftover turkey. There will be turkey soup bubbling on stoves Friday and turkey sandwiches to last through the weekend. Here's a different spin on turkey leftovers - a curry. It's a great quick stew for using up all manner of leftover protein. If you don't have turkey, use cooked chicken, cooked shrimp, tofu, or a favorite in my house, leftover leg of lamb.

Quick Turkey Curry
recipe adapted from The Turkey Cookbook by Rick Rodgers
(4 servings)

3 tbl butter
1 medium onion, chopped
1 Granny Smith apple, cored and chopped
2 cloves garlic, minced
2 tbl curry powder
2 tbl flour
1 1/2 cups Turkey Stock or Chicken Stock
3 cups turkey, chopped into bite-sized pieces (about 1 pound)
1/2 tsp salt
1/2 cup plain yogurt (nonfat, low-fat or full-fat)
3/4 cup frozen mango, thawed  and chopped (or 1 medium banana, cut into 1/2" slices)
1/2 cup toasted sliced almonds (see Note)

In a large skillet, melt the butter over medium heat. Add the onion, apple, and garlic and cook until the onion is softened and just golden.

Sprinkle onions with curry powder and stir for 15 seconds.

Sprinkle onions with flour and cook for another minute.

Stir in broth, bring to a simmer and then cook on medium-low for 5 minutes.

Stir in turkey and salt. Cook for 5 minutes to reheat turkey.

Add yogurt and mango. Stir to combine and remove from heat. If you cook the yogurt too long, it will separate and you'll see little flecks of white. Your sauce won't be as smooth either but it's still perfectly fine to eat.

Sprinkle with toasted almonds and serve over rice.

Note: to toast nuts put them on a cookie sheet and place in a preheated 300 degree oven for 5 minutes. Don't forget them - they burn quickly!

Apples


"As American as Apple Pie." Though apples aren't native to North America, they are certainly associated with the US. They were brought from the Old World to the US early in our history, but these trees didn't fare well here. Most of our apple varieties were actually bred here, making the apple truly American.

Apples are available year round now. US apples are put in cold storage in the fall and shipped out most of the year. And if that isn't enough apples for you, they are shipped from temperate regions in the Southern Hemisphere, such as New Zealand, in the northern spring.

The fact that apples are kept in cold storage is a clue to how you should store them once you get them home. They should be refrigerated to maintain their crisp texture. Unrefrigerated apples quickly turn mealy which is definitely not a good eating apple.

Many people are bewildered by the seemingly endless variety of apples available in your average US supermarket. Who can blame them? How do you pick an apple for a pie? To put in your lunch? To make pork and apples? Here's a list of the most widely known apple varieties, their characteristics, and best uses from the Apple Journal, a great site for all things apple.

Braeburn: an excellent eating and cooking apple with a nice sweet-tart flavor. It's a good keeper. Great for salads because it doesn't turn brown very quickly.

Cameo: like Braeburn, an excellent eating and cooking apple that doesn't brown quickly. It stores well and holds its shape when cooked. More sweet than tart; the balance of the two makes for a mild, tasty apple.

Cortland: a good fresh-eating apple but it doesn't store well, so get it in fall before it's been sitting in storage. Another apple that browns slowly, making it an excellent choice for salads.

Empire: a good all-purpose apple with a firm texture and sweet flavor. It stores fairly well.

Fuji: an exceptional apple both for its excellent mild flavor and its keeping qualities. Even Fuji's stored until into the spring are fine fresh eating apples.

Gala: a sweet, mild apple best for fresh-eating. Not a good keeper so enjoy while in season in the fall.

Golden Delicious: a mild eating apple, some would say kind of dull. Best in season, not out of storage. Good for cooking in pies or sauces.

Granny Smith: quite tart, very crisp and it holds up well in shipping and storage. More a cooking apple than a fresh-eating apple but if you like your apples tart, this is the apple for you.

Honeycrisp: the new apple on the block. Many consider this the best fresh-eating apple around and it often commands prices to match that popularity. Crisp, juicy and perfectly tart-sweet. Good cooking apple.

Jonagold: a good juicy eating apple with a complex flavor. Best in season.

Jonathon: excellent eating apple that keeps well. It does not hold its shape in cooking so best for sauce or fresh-eating. It is a 200 year old variety from New York state, making it truly American.

MacIntosh: A tangy spicy apple in season but their texture goes soft (though not necessarily mealy) in storage. Best eaten in season. Good for pies and sauce but doesn't hold its shape in cooking.

Red Delicious: the iconic-looking apple with shiny red skin. Unfortunately, its flavor doesn't live up to its name and it is often stored way too long.

Saturday, September 10, 2011

That's peachy!

It's still peach season here in Colorado. Beautiful peaches are available everywhere. A really ripe peach is a summer joy. You know the kind - you need to eat it over the sink. But, peaches are a great year-round treat because they freeze so well. You can pick up a bag of frozen peaches at the supermarket and keep them stashed for smoothies, peach sauce - great on pancakes, and peach desserts like crisps or cobblers.

Here's a peach topping that is so easy. You use the microwave to cook the peaches in a simple maple syrup flavored sauce. Real maple syrup is expensive, but this extends that luxury by mixing it with peaches. Imitation maple syrup works too if real maple syrup isn't in your budget.  The peaches are good on pancakes, pound cake, ice cream, or frozen vanilla yogurt. It's a fruity way to sweeten plain yogurt too.

Peach Slices with Maple Syrup
(adapted from Complete Book of Small-Batch Preserving)

1/4 cup maple syrup
2 tablespoons sugar
4 large peaches, peeled and sliced OR 3 cups thawed frozen peach slices

Combine maple syrup and sugar in a 4 cup microwavable container. Microwave on high for 1 minute or until sugar is dissolved.

Add peach slices, cover and microwave for 3 additional minutes. Let stand, covered, for 2 additional minutes.

Use hot, cool in the refrigerator or freeze in plastic containers if not using in the next week.

Note: 2 Tablespoons of Amaretto or Sherry can be added when peach slices are added, if desired. Amaretto, an almond liqueur from Italy, and peaches are a particularly tasty combination.

Monday, July 25, 2011

Curried Chicken Salad


This recipe is a riff on Thai Curried Fried Rice. That classic Thai restaurant preparation uses Indian curry powder (not Thai curry paste) and pineapple. Curry goes great with the chicken and fruit in the salad.

This recipe also gives us the opportunity to introduce the extremely useful technique of cooking chicken in a microwave. You can get pre-cooked chicken in most supermarkets, but it is quick and easy to cook it for yourself. It’s cheaper and you know the chicken isn’t “enhanced” with lots of salt and preservatives.

Curried Chicken Salad
Makes 2 servings

1½ cups chopped chilled cooked chicken breast (about 8 ounces)
½ cup halved seedless red grapes
½ cup diced apple
2 Tablespoon diced pineapple (canned is fine)
1 Tablespoon raisins (or one small kid’s box)
3 Tablespoon mayonnaise
1 tsp honey
½ teaspoon curry powder
½ teaspoon lemon juice
⅛ teaspoon salt
⅛ teaspoon pepper
1 Tablespoon sliced or slivered almonds, toasted at 300 F° for 5 minutes and cooled

Combine first 5 ingredients (chicken through raisins) in a large bowl.  In another bowl, combine mayonnaise and next 5 ingredients (through pepper) stirring with a whisk.  Pour mayonnaise mixture over chicken mixture, toss gently to coat.  Sprinkle with almonds.  The amounts are approximate, so use as much or as little as you like.  And, getting the fruit and chicken at a salad bar is a great way to get just as much as you need.

Tip
To microwave chicken:  Put chicken in a glass dish and cover with plastic wrap, leaving a corner open to let out the steam. Cook on high power. The time depends on the size of the chicken breast.
·      4-6 minutes for 1 boneless skinless chicken breast
·      7-9 minutes for 2 boneless skinless chicken breasts
·      10-12 minutes for 3 boneless skinless chicken breasts

Turn it 180 degrees halfway through cooking.  After cooking, let stand 5 minutes before removing the plastic wrap. Open the wrap away from you so you don’t burn yourself with the steam. Cut chicken to check that the chicken is cooked all the way through. Times here assume a high-powered microwave; your mileage may vary. Season cooked chicken with a sprinkle of salt and black pepper. Chill before using in salad.