Showing posts with label vegetarian. Show all posts

Monday, October 19, 2015

Pressure Cooker Breakfast: Steel-cut Oats

My electric pressure cooker. One of my favorite kitchen appliances. This one also slow cooks and sautés.
About a year ago, I posted a recipe for steel-cut oats cooked in the pressure cooker. The secret to pressure cooker oats is to use non-dairy milk. Cow's milk contains sugar - lactose, specifically -  and it can scorch to the bottom of your pot. Nut milks don't have lactose, nor much of any other sugar unless sweetened.

This new recipe still uses non-dairy milk, but the proportions are different. I made a mistake and added too much water the last time I made them. And, I liked it better! The oats are creamier and don't set up quite as stiff, which makes them better the next day.

Pressure Cooker Steel-Cut Oats, the 2015 version
(serves 4)

3 cups water
1 cup non-dairy milk, such as almond or coconut
1 cup steel-cut oats
12 dried apricots, chopped (see Note)
½ teaspoon vanilla extract
2 big pinches salt

Garnishes
4 Tablespoons chopped nuts or nut butter
4 teaspoons brown sugar or maple syrup

Put everything but the garnishes in the pressure cooker, lock down the lid, and bring up to pressure. Cook for 3 minutes (4 minutes at 5000 ft. altitude). Turn off the heat and allow pot to cool for 10 minutes. Release the pressure. To serve, garnish with chopped nuts and sweetener. Any nut is yummy but I really like roasted pistachios with dried apricots.

Note: Dried apricots can be sticky. If you freeze them for 10 minutes then chop them, they won't stick to your knife.

Monday, March 16, 2015

Meatless Monday: Cauliflower Marranca

It's not particularly photogenic, but it tastes really good!
A recipe from the original Moosewood Cookbook. Made a few changes - added tomatoes, used quinoa, measured the added fat, and added the crunchy topping. I'm not against fat but it does carry a heavy caloric punch. You need some to carry flavor and give richness but I see no point in gilding the lily, as my mom would say. The original gave no amounts for the fat (butter in the original) at all.

This is a good recipe to use up bits of cheese. Two cups is enough, but you can add a bit more, if you want to use up what you've got.

Cauliflower Marranca
(serves 6-8)

non-stick cooking spray
1 pound mushrooms, chopped or sliced
1 medium onion, chopped
3 ½ Tablespoons oil, divided
1 14 oz. can diced tomatoes, undrained
½ teaspoon dried oregano, crushed
1 medium head cauliflower, cut into florets and core cut into bite-sized pieces
2 cloves garlic, minced
salt
black pepper
1 Tablespoon fresh or frozen chopped basil
3 cups cooked quinoa or brown rice
2 - 2 ¾ cups grated cheese (jack, mozzarella, cheddar, manchego)
¼ cup dry bread crumbs

Preheat the oven to 350°F. Spray a large casserole dish with cooking spray and set aside.

Heat 1 ½ Tablespoon oil in a large skillet over medium heat. Add the mushrooms and onion. Sauté for 5 minutes. Add the tomatoes and their juice, and the oregano. Cook until most of the liquid evaporates. Add ½ teaspoon salt and ¼ teaspoon black pepper. Pour all this into a large bowl.

Wipe out the pan, add 1 ½ Tablespoon oil, and heat over medium-high heat. Add the garlic, cook for 30 seconds, then add the cauliflower and 2 Tablespoons water. Cover tightly and reduce the heat to medium. Steam cauliflower until tender, about 10 minutes. Season with salt and pepper. Pour into bowl with mushrooms. Add chopped basil, cooked quinoa/rice, and cheese. Taste and add additional salt and pepper, if needed.

Pour into the prepared dish, cover, and bake for 25 minutes (35 minutes if the grain is cold). Combine the bread crumbs with ½ Tablespoon oil and mix until all the crumbs are moistened. Raise the temperature of the oven to 425°F. Sprinkle the bread crumbs evenly over the top of the casserole. Return to the oven, uncovered, to bake until top is browned and crunchy, about 10 minutes.

Let sit for 5-10 minutes. It is very hot right out of the oven and it's easier to serve if allowed to set up.

Best if reheated in the oven to keep the topping crunchy but it reheats OK in the microwave too.

Adapted from Moosewood Cookbook by Mollie Katzen, Ten Speed Press, 1977.

Monday, March 9, 2015

Spring Greens season is here - make some Saag


Spinach is one of the first greens to pop up in the garden in the spring. Amazingly, spinach can germinate in cold soils, as cold as 33 °F! I usually plant spinach in the fall, when it germinates easily in the warm soil. When the cold weather comes, it hibernates for the winter. As soon as the soil warms up again in the spring, it's off and running. That makes spinach the very first green to make it to my table.

I posted this recipe for Saag Paneer, which is Indian Greens with Cheese (or tofu if you prefer - it's easier to find than the fresh cheese and much cheaper). The original recipe called for frozen spinach, which is inexpensive and available year-round. But, this being the start of spring greens, you can make it with fresh spinach. Substitute 2 bunches of coarsely chopped fresh spinach for the frozen spinach and make the original recipe as written.

If you do use fresh garden or farmers' market spinach, make sure you wash it well (the process is described in this recipe for sautéed kale) because it holds onto sand and gritty greens is way icky.

Nowadays, you can also get bags of triple-washed fresh spinach, which is a great leap forward for spinach. You'll need a big bag of spinach for this, 20-24 oz. worth.

Monday, February 23, 2015

Shells with Peppers


A super simple Italian dish for Meatless Monday: pasta shells in a hearty sauce of peppers, onions, and tomatoes. Flavored with some basil and Parmesan cheese. All that there is to it and chock full of delicious veggies.

Pasta Shells with Peppers
(serves 4-5)

2 Tablespoons olive oil
1 Tablespoons butter
1 medium onion, peeled
1 pound bell peppers (whatever color you like), about 3 medium peppers
1 14 oz. can diced tomatoes, undrained
5 sprigs fresh basil
1 teaspoon salt
½ teaspoon black pepper
1 cup grated Parmesan cheese

Core the peppers and then slice lengthwise. Cut the onion in half, then slice. Pick the leaves off the basil sprigs. Rip or chop the leaves coarsely. Start a large pot of boiling salted water for the pasta.

Heat the oil and butter in a large skillet over medium-high heat. Sauté onions until golden and no longer crunchy, but not browned. Add the peppers and raise the heat to high. Sauté until the peppers are limp. Turn down the heat to medium-low. Add the tomatoes, basil, salt, and pepper. Cover and simmer for 15 minutes. Remove the cover, reduce to low, and continue cooking while you cook the pasta.

By now your pasta water should be boiling. Add the pasta and cook until al dente, about 8 minutes. Drain the pasta and dump into the skillet. Stir to combine - a large spoon and tongs work better than just a spoon. Then stir in ½ cup of the cheese. Stir gently. Taste for salt; add more if needed. Serve immediately with remaining cheese as garnish.

Adapted from Food alla Florentine by Naomi Barry & Beppe Bellini, Doubleday & Company, 1972.

Monday, February 16, 2015

Meatless Monday: Spinach Lasagne


Previously, I posted a recipe for meatless Spinach Lasagne that is "baked" in the microwave. Here's a similar recipe that is cooked in the oven and it uses no-boil noodles. This makes the recipe easier, though the time is about the same. You have to give the noodles time to cook once it's assembled but you don't have to deal with cooking the noodles ahead.

Oven-Baked Spinach Lasagne
(serves 6-8)

9 no-boil lasagne noodles (2" wide by 10" long)
non-stick cooking spray
2 Tablespoons vegetable oil
1 medium onion, chopped
2 cloves garlic, minced
1 8-ounce can tomato sauce
1 6-ounce can tomato paste
1 ½ cups water
1 Tablespoon vegetable stock concentrate or dry vegetable soup mix
½ teaspoon salt
1 teaspoon sugar
½ teaspoon dried basil
½ teaspoon dried oregano
¼ teaspoon black pepper
a pinch of crushed red pepper flakes
12 ounces frozen spinach, thawed but not drained
2 cups low-fat cottage cheese, a 16 ounce container
2 eggs
8 ounces shredded part-skim mozzarella cheese (2 cups)
½ cup Parmesan cheese

Preheat oven to 400°F. Spray a 9"x 11" baking dish with cooking spray.

Heat oil in a large skillet. Sauté onion for 4 minutes. Add garlic, cook for another minute. Add tomato sauce, tomato paste, water, vegetable soup mix, salt, sugar, basil, oregano, black pepper, and crushed red pepper. Stir to combine and bring to a simmer. Keep warm while you mix up the filling.

Combine the spinach, cottage cheese and eggs in a medium bowl.

To assemble, lay 3 noodles in dish  Ladle on ⅓ of the sauce, ½ the spinach mixture, then sprinkle on ¾ cup of mozzarella cheese. Repeat layers, finishing with another 3 noodles covered by the remainder of the sauce, making sure that the noodles are completely covered. Cover tightly with foil.

Bake for 40 minutes. Remove the foil and sprinkle on the last ½ cup mozzarella cheese and parmesan cheese. Bake for 10 more minutes. Let stand for at least 10 minutes before serving to allow cheese to set up which makes lasagne easier to cut.

Freezes well.

Monday, January 19, 2015

Meatless Monday: Low Lactose Mac and Cheese


My lovely daughter spent 6 weeks in Southeast Asia last summer. Not a whole lot of dairy in that part of the world. At some point, she was able to get a latte chai. Little light bulb went off - maybe dairy and me don't really get along? She tolerates many cheeses because they are low in lactose. Milk and cream are chock full of the stuff. Sure, there are lactose free milks but they don't taste quite the same. Of course, neither does coconut milk but she really likes coconut milk. So, that's where this recipe came from. Many people have trouble digesting lactose so I offer this recipe to all those lactase-challenged people out there.

When shopping for a low lactose cheese, check the label for sugar. Lactose is the sugar in milk products. Cheeses that are low in sugar have very little lactose. Aged cheeses usually have low levels of lactose so a nice medium cheddar is a good choice here. Don't use processed cheese. They are very high in lactose because whey or milk (both high in lactose) are added during processing. Really, don't use processed cheese even if you can tolerate lactose. That stuff is a poor substitute for cheese, taste-wise.

If you don't have any trouble digesting lactose, you can use cow's milk in this recipe for the sauce. But, give the coconut milk a try and see what you think. Different flavor but still real good comfort food.

Saucy Stovetop Low Lactose Mac and Cheese
(serves 4)

2 cups elbow macaroni
salt for the pasta cooking water
1 ½ Tablespoons vegetable oil
2 Tablespoons all purpose flour
a pinch of powdered garlic, optional
a pinch of powdered onion, optional
¼ teaspoon dry mustard
1 ¼ cups coconut milk or other non-dairy milk
8 oz. low lactose cheese such as a medium cheddar, grated
¼ teaspoon black pepper
¼ teaspoon salt
1-2 teaspoons Tabasco or other vinegar-based hot sauce
¼ cup finely grated Parmesan cheese

Bring a pot of 3 quarts of water to a boil. Add about 1 Tablespoon kosher salt (a little less if using regular salt). When the water comes to a boil, add the macaroni. Cook until al dente, about 9 minutes. Drain well, run under cold water to stop the cooking, and set aside.

In the same pot, heat the oil over medium heat. Add the flour and cook until golden, about 4-5 minutes. Add the powdered garlic, powdered onion, and dry mustard. Stir to combine. Whisk in coconut milk. Keep whisking until sauce thickens and the sauce comes to a boil. Reduce the heat to low. Add the cheese a handful at a time, whisking to melt it after each addition. When all the cheese is added and melted, add in black pepper, salt, Tabasco, Parmesan cheese, and cooked pasta. Stir to cover all the macaroni with sauce. It will be saucy. Taste, add more black pepper, Tabasco, or salt, if desired. Serve while really hot.

Friday, December 26, 2014

Greek Vegetables


This is a great recipe when you have bits of Mediterranean vegetables languishing in your fridge. I threw this together for Christmas Eve dinner with some fresh veggies and some garden veggies that I had stashed in the freezer. Consider this a template for getting more vegetables onto your plate. If you don't like eggplant, add more of the other things you do like.

The use of olive oil is generous, as is typical in Greece, though I've cut back from traditional Greek recipes that would call for even more. Olive oil makes vegetables delicious. Vegetables on their own are very low in calories but high in many other things that are good for you. If some olive oil gets you to eat more vegetables, I'm all for it.

Greek Vegetables
(serves 8)

4-6 Tablespoons olive oil, divided
1 cup chopped onion or leeks
4 cloves garlic, minced
2 bell peppers, whatever color you have, large dice
2 cups peeled eggplant, large dice
2-3 cups zucchini, large dice
1-2 cups frozen artichoke hearts
1 14 oz. can diced tomatoes, undrained
1 teaspoon oregano or summer savory
about 1 teaspoon salt
½ teaspoon black pepper

Heat up a dutch oven or large deep skillet over medium heat and add 2 Tablespoons olive oil. Add the onion/leek, garlic, and bell peppers, and sprinkle with ½ teaspoon salt. Cook for 10 minutes until onions are quite soft but not browned. Add the eggplant and cover. Cook for 10 minutes. Add the remaining ingredients along with another 2 Tablespoons of olive oil. Bring to a simmer. Then reduce the heat to low, cover, and cook gently for 30 minutes until all the vegetables melt together in olive oil goodness. Check for salt. Before serving, drizzle on remaining 2 Tablespoons of olive oil, if desired.

Recipe adapted from Ikaria by Diane Kochilas, Rodale, 2014.

Photo: By Dana Payne (Own work) [CC BY-SA 3.0 (http://creativecommons.org/licenses/by-sa/3.0)], via Wikimedia Commons

Monday, November 24, 2014

Braised Tofu and Leeks


Leeks look like giant scallions. Their flavor is milder than green onions and much milder than yellow onions. Fall is leek season - they take a long, long time to reach a good size. I grow them in my garden and I need to plant the seeds inside in January and won't start picking them until late summer/early fall. Lucky for you, leeks are available year round in supermarkets.

The big drawback for leeks is they need to be washed carefully. They are buried in soil to increase the amount of white stalk (look for leeks with a lot of white stalk - they are more tender). That soil gets in between the leaf layers. To clean them, cut off the dark green leafy top and the root end. Cut the leek lengthwise and swish energetically in dislodge the dirt. Check between the layers for hidden sand. On the plus side, they won't make you cry as much as other onions. :-)

I like to use them in Chinese dishes. Their mild flavor complements garlic and ginger. Their texture is nice in stir fries or braises. Here, I add water chestnuts and bamboo shoots, increasing the vegetable count in this one pot braise. Tofu replaces the meat for this Meatless Monday entree.

Braised Tofu and Leeks
(serves 4)

14-16 oz. firm tofu, cut into 1" cubes
2 Tablespoons vegetable oil
1 large clove garlic, minced
½ Tablespoon minced or grated ginger, about an 1" piece
1 leek, white and light green part only, washed well (see intro) and cut into 1" slices
2 cups vegetable stock (see Note)
½ teaspoon salt
1 Tablespoon soy sauce
½ teaspoon sugar
1 8 oz. can sliced water chestnuts, drained
1 8 oz. can sliced bamboo shoots, drained
1 Tablespoon cornstarch
1 Tablespoon cold water
4 Tablespoons sliced almonds, toasted, for garnish

Place the tofu cubes on a towel to soak up excess moisture.

Heat up a wok or deep skillet over high heat. Add the oil, then the garlic and ginger. Stir and add the leeks. Stir fry until the leeks wilt and start to brown in places. Add the stock, salt, soy sauce, sugar, water chestnuts, bamboo shoots, and tofu. Reduce heat to medium and cook for 4 minutes. Increase the heat to bring the stock to a boil. Dissolve the cornstarch in the cold water and add to the wok. Stir until the sauce thickens. Taste for salt. Serve over hot rice with a Tablespoon of sliced almonds for garnish.

Note: Though not vegetarian, this is excellent made with ham or chicken stock. 

Sunday, November 16, 2014

Indian Greens and Cheese


I love the interesting flavors in Indian food. India has so many amazing spices that the combinations are limitless. There is also a strong tradition of vegetarian cooking. You put these two together and you have the makings of a delicious Meatless Monday meal.

Paneer cheese is the firm, drier cheese used in saag (spinach) paneer. It will keep its shape and won't melt. Mozzarella will melt and become gooey (in a good way). Queso fresco (also called queso blanco) can go either way depending on how dry it is. Any of them are delicious but the texture will be quite different.

Garam masala is a blend of warm spices, often coriander, cinnamon, cardamom, cumin, and cloves. Unlike curry powder, it doesn't contain turmeric, the spice that gives curry its yellow color. It is available in many supermarkets, Indian markets, and Savory Spice Shops.

Indian Greens and Cheese
(serves 4)

1 Tablespoon butter
1 Tablespoon vegetable oil
¼ teaspoon fennel seeds
¼ teaspoon ground cardamom
1 medium onion, peeled and sliced thinly
1 Tablespoon minced or grated ginger
1 pound of greens (beet, chard, or spinach), washed well
¼ teaspoon salt
a pinch of cayenne
8 oz. queso fresco, mozzarella, or paneer cheese, cut into ½" cubes
a pinch of garam masala, optional

Heat a dutch oven or large covered skillet over medium-high heat. Add the fennel seeds and ground cardamom. Stir for a few seconds, then add the onion and ginger. Cook until browned, stirring often to prevent burning. Add the greens and cover. Cook for a few minutes until the greens begin to wilt. Stir to mix onions with greens. Sprinkle with salt and cayenne. Reduce the heat to medium-low, cover, and cook for 20 minutes until greens are tender. Add cheese cubes, cover, and cook for 5 more minutes. Remove from heat. Sprinkle with a pinch of garam masala, and add more salt if needed. The cheese can be salty so you may not need any. Serve over rice.


Friday, October 31, 2014

Bleeding Barley


OK, it's Halloween, so gross is rather in style. :-) This recipe isn't as disgusting as the title would indicate. The "blood" comes from beets, which are scary for lots of folks. I love beets - they are little sweet like carrots but more earthy. Some would argue that's a nice way of saying they taste like dirt. Try them like this before you dismiss them.

The best way to cook them is either roasted or in the microwave. Boiling them is an option too, but I like the microwave better. You don't need to peel them before cooking them. The peel is easier to remove after they are cooked. I suggest you use latex gloves when peeling and cutting up beets. They will turn your hands bright pink to blood red. Which would be fitting on Halloween, now that I think of it.

Not a true risotto - that's made with short-grain rice - barley risotto has a similar creamy texture and cooked in the same way. It's less expensive; pearl barley is inexpensive while arborio rice can be pricey. The stirring releases the starch, which is what gives risotto its creamy texture, not cream or butter. Though many recipes say you need to stir constantly, that's not really necessary. Stirring every few minutes is sufficient. Yes, it takes some work but not too much.

Bleeding Barley
(serves 4 as a light entree, 6 as a side dish)

3 medium beets, about 12 oz.
oil
6-7 cups chicken or vegetable stock
3 Tablespoons butter
¼ cup minced onion (or 1 Tablespoon dried minced onion)
2 cups pearl barley
salt
½ teaspoon black pepper
1 Tablespoon lemon juice
cheese (optional)

Trim the off the leaves and cut the stem within 1" of the beets. Trim off the hairy tip of the root. Wash well. Using a large kitchen fork, poke each beet a few times. Rub them with oil. Place in a microwaveable dish with a couple of tablespoons of water and cover. Microwave on high 10 minutes. Give the a poke with a paring knife to see if they are tender. When they are cooked, the knife will go in easily. If not fully cooked, move them around in the dish, recover, and cook for another few minutes. Uncover and let cool for 5 minutes. Peel them with a paring knife and dice. Set aside.

Bring the stock to a simmer and keep it there. Heat the butter in a large saucepan or dutch oven over medium heat. Add the onion and stir. Cook until softened, 2 minutes. Add the barley, and cook, stirring, for 2 more minutes. Add 1 cup of stock, and stir frequently until all the stock is absorbed. Maintain a simmer - reduce to medium-low if the stock sizzles when you add it. When the previous addition of stock is absorbed, add another cup of stock and continue stirring and cooking until the barley is tender, about 30-40 minutes. You need to try it to see if it's done at 30 minutes. It should be slightly chewy but not hard in the center. If it's not done, add more stock and keep going.

Add diced beets, last tablespoon of butter and black pepper, and mix to melt butter and incorporate the beets. The risotto will turn a lovely shade of pink. Taste for salt. If your stock is salted, you may not need any more. To serve, grate or crumble on cheese, if using. Creamy goat cheese is the traditional complement to beets, but you can use Parmesan, blue cheese, or an aged sheep cheese like Manchego instead.

Thursday, October 30, 2014

Dan-Dan Noodles

Another recipe from my class this week, a vegetarian version of a popular street food in China. There is quite a bit of interpretation in this recipe. I'm not sure what makes it Dan-Dan noodles besides spicy (as it came out of Sichuan cuisine) and noodles. I'm even willing to drop the spicy if it gets you to try it out.

You can use fresh noodles, even Italian pasta such as fettucini or linguine. Or you can use dried Chinese egg noodles. If you are very ambitious, you can make you own egg pasta. Takes a bit of time and elbow grease rolling it out. Lots of fun and the resulting pasta has a very satisfying bite. I understand if you want this to be fast and easy, though.

Many of the recipes use stir fried ground pork. This is vegetarian, and I substituted tofu for the pork. The tofu, which is pretty bland stuff on its own, absorbs the sauce nicely, as do the noodles. My students, some who said they didn't care for tofu, declared it quite tasty.

Dan-Dan Noodles
(serves 4)

Sauce
3 Tablespoons soy sauce
1 Tablespoon cider vinegar
1 Tablespoon Asian sesame oil
1 clove garlic, minced
1 scallion, minced
1 teaspoon chile oil (optional or use more if you like hot)
1 Tablespoon vegetable oil

14-16 oz. soft tofu, cut into small cubes
½ pound fresh egg noodles or 6 oz. dried noodles
2 Tablespoons chopped roasted peanuts

In a large bowl, combine the sauce ingredients. Add the cubed tofu and gently toss so the tofu doesn't break apart.

Cook the noodles in a large pot of water until just tender. Drain and put in the bowl with the sauce. Toss to cover the noodles in the sauce. Sprinkle with chopped peanuts. When serving, use a spoon to make sure you get the tofu along with the noodles.

Monday, October 27, 2014

Cabbage Dumplings

Class this week! My students requested dumplings and noodles. We're making our own noodles - pasta is easy and fun - and adding some Asian sauces. We are not making our own dumpling wrappers however. Thank goodness for decent wonton wrappers in most every well-stocked supermarket! This is a vegetarian dumpling, stuffed with cabbage and shiitakes. It's served with a simple hot-sour-spicy dipping sauce.

Using a cole slaw mix makes this a bit quicker. It's a lot cheaper to chop your own cabbage but we're trading money for time in this recipe. There are often large pieces of cabbage or carrot in the cole slaw mix. Quickly chop the cole slaw to cut down any chunks. This makes it easier to put in the wrappers later.

Leftover filling makes a good Asian "frittata." I'll be posting that super-simple recipe later this week.

Cabbage Dumplings with Hot and Sour Dipping Sauce
(makes a bunch, about 30)

14 oz. bag cole slaw mix, chopped into small bits
6 fresh shiitakes
2 cloves garlic, minced
2 scallions, minced
2 Tablespoons vegetable oil
1 ½ Tablespoons soy sauce
¼ teaspoon salt
¼ teaspoon black pepper
1 teaspoon Asian sesame oil

1 package (around 1 pound) round wonton wrappers
non-stick cooking spray

Hot and Sour Dipping Sauce
4 Tablespoons soy sauce
3 Tablespoons cider or rice vinegar
1 teaspoon sugar (optional)
chile oil, Siracha sauce, or chile garlic paste (optional)

Remove the stems from the shiitakes (stems are too tough to eat but you can add them to soup for flavoring). Chop caps into small bits. Mix with the cole slaw.

Heat a wok or large skillet over high heat. Add the oil. Add the garlic and scallions. Stir fry for 20 seconds. Add the cole slaw mix. Stir fry until the cabbage is no longer crunchy, stirring so that it doesn't burn. It's OK to get a little char; this brings out the sweetness in the cabbage but you don't want to incinerate it. Add the soy sauce, salt, and pepper. Stir until the soy has been absorbed by the cabbage. Remove from the heat and add the sesame oil. Stir then let it cool for 10 minutes in the fridge.

To wrap dumplings, place 1 heaping teaspoon of filling in the center of the wrapper. Carefully pick up the wrapper in your hand and hold in your palm. Using 1 finger on your other hand, smear a little bit of water along the edge of half of the wrapper. Press the edges together to seal. If you want to impress your friends, learn how to pleat the edge but that's just showing off. :-) Fill and seal all the dumplings.

Put an inch of water in a pot that fits the steamer and bring to a boil. Spray the steamer with cooking spray and place the dumplings in the steamer in a single layer and not touching (or they will stick together). Place in the pot over boiling water. Cover and steam for 8 minutes. Serve with dipping sauce.

To make the dipping sauce: combine soy sauce, vinegar, sugar, and chile oil in a small bowl and mix to dissolve the sugar. The soy and the vinegar are the base. If you like it really sour, leave out the sugar. If you like it spicy, add the chile oil/sauce.

Dumplings can be made ahead then frozen. If frozen, cook for 10 minutes.

Monday, October 13, 2014

Turkish (or maybe Greek?) Stuffed Peppers


Turkish cooks are experts at stuffing all sorts of vegetables. This recipe is a mash-up of a classic Turkish vegetable stuffing and some Greek flavors. It's not so crazy; they are neighbors.

The filling itself is easy. Stuffing peppers isn't that hard either. But, it all takes a while, particularly the cooking of the peppers. You need to braise them a long time until they are tender. The great thing is they reheat well so you can make a panful and have a quick meal by throwing a pepper in the microwave.

The filling contains short-grain rice (such as sushi rice) which is stickier. It holds together as a stuffing better than long-grain rice.

Stuffed Peppers
(serves 6)

6 large bell peppers, whatever color you like
4 Tablespoons olive oil
2 onions, chopped
4 cloves garlic, minced
2 Tablespoons raisins or dried currants, soaked for 5 minutes in hot water
1 10-12 oz. package frozen chopped spinach
1 ¼ cups short grain rice
1 ½ teaspoons salt
½ teaspoon black pepper
½ cup chopped parsley
¼ cup chopped fresh dill
4 oz. crumbled feta cheese
juice of 1 lemon
stock or water

Cut off the top of the peppers as high as you can to leave a large cavity. Remove the core and seeds. If the peppers won't stand up straight, you can take a very thin slice off the bottom to make them flat. Then they won't tip over in the pan. Set aside the peppers.

Heat 2 Tablespoons olive oil in a large covered skillet or Dutch oven over medium-low heat. Add onions and garlic. Cook for 10 minutes until onions are soft but do not brown them. Drain the raisins. Add raisins and spinach and raise the heat to medium. Cook until spinach has thawed. Add the rice, ¾ teaspoon salt, pepper, and 1 ½ cups of water or stock. Stir to mix, bring to a boil, reduce to a simmer, and cook until the liquid is absorbed, about 15-20 minutes. Remove from the heat. Mix in herbs and cheese. Taste the filling and add more salt if needed. If the filling is bland, it will be even blander after steaming for nearly an hour so season well.

Season the insides of the peppers with salt. Fill each pepper with stuffing. When you have used up all the stuffing, wipe out the pan and place the peppers in the same pan (you don't want to have to do more dishes, do you?). Pour enough stock or water into the pan to cover the bottom of the pan. If you are using water or unsalted stock, add ½ teaspoon of salt to season it. Drizzle the lemon juice and the remaining olive oil over the peppers. Put on their tops. Bring the liquid to a boil, then reduce the heat to low, just enough to maintain a simmer. Cover the pan and steam the peppers for about 50 minutes until quite tender. If you pierce one with a knife, it won't resist at all.

Serve hot or at room temperature. A little bit of extra virgin olive oil, chopped fresh parsley and/or dill, or crumbled cheese are all nice garnishes. I also like it for breakfast, topped with a fried egg.


Wednesday, October 1, 2014

Vegetarian Pastitsio


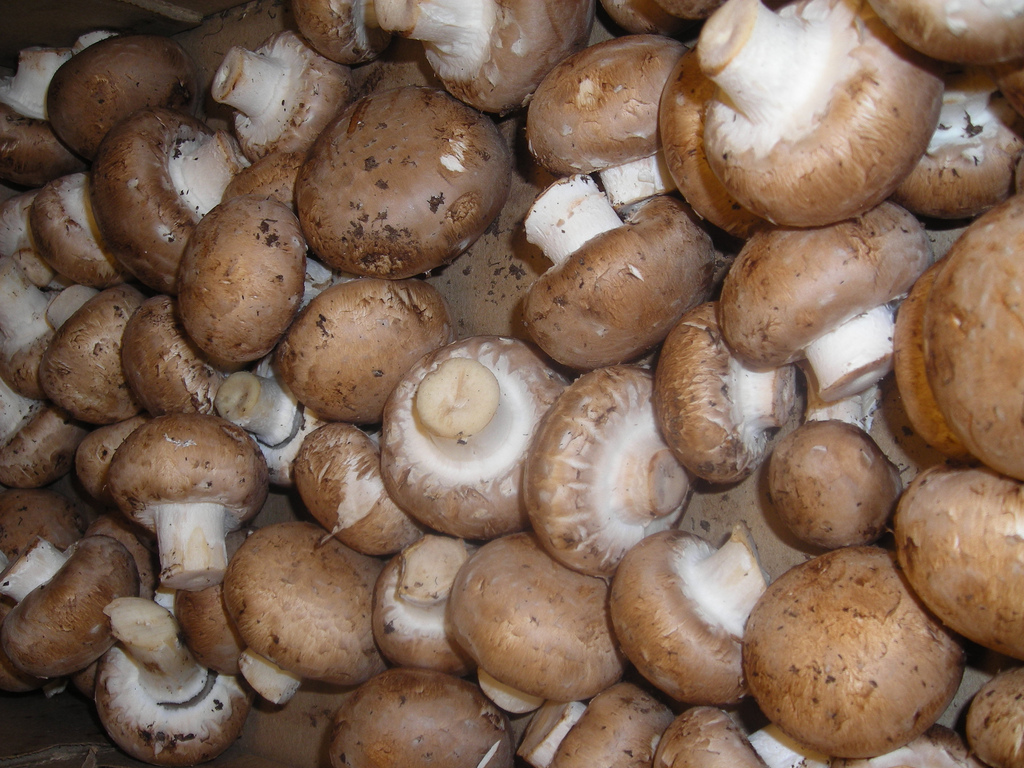
Here's a great tip for the vegetarians out there for adapting the traditional Pastitsio recipe I posted earlier this week. Instead of using 1 pound of ground meat, substitute 1 ½ pounds chopped mushrooms. Mushrooms have a savory flavor and substantial texture, making them a great meat substitute. You won't need to pour off any fat because mushrooms have next to none. In fact, I would increase the olive oil to 4 Tablespoons to make them a bit richer. The rest of the recipe stays the same.

Photo credit: By wikioticsIan (Mushrooms (cremini)) [CC-BY-SA-2.0 (http://creativecommons.org/licenses/by-sa/2.0)], via Wikimedia Commons

Monday, June 16, 2014

Cold Spicy Noodles with Shredded Vegetables

I used whole wheat spaghetti. It adds a nice nutty, hearty flavor.

It's heating up and this is one of my favorite cold dishes for summer. Cold noodle salads are very popular in many Asian countries, including China, Vietnam, and Japan. The type of noodles changes as do the seasonings, but they are all packed with flavor and cooling on a hot summer night.

My version is most like the Chinese version with the toasty flavor of Asian sesame oil, and a good dose of chili oil. If you don't have chili oil, you can use Siracha sauce. You can leave out the chili if you don't like spicy and it will still have good flavor.

Cold Spicy Noodles with Shredded Vegetables
(serves 4 as a main dish)

Salad
1 pound spaghetti
1 Tablespoon salt (for cooking water) plus 1 teaspoon salt for salad
1 red pepper, cored, seeded and sliced thinly
2 carrots, shredded or grated
4 scallions, thinly sliced for garnish
1 Tablespoon sesame seeds, toasted until golden and cooled
cilantro leaves for garnish (optional)

Dressing
1 teaspoon sugar
2 Tablespoon soy sauce
1 Tablespoon seasoned rice vinegar
½ to 1 teaspoon chili oil or Siracha sauce
2 Tablespoons Asian sesame oil
2 Tablespoons vegetable oil

Bring a large pot of water to a boil and add salt. Cook spaghetti until just al dente, about 9 minutes. Drain and rinse under cold water until noodles are cold. Dump onto a clean kitchen towel to dry off - you don't want to add a bunch of water that is sticking to the noodles because it will thin out the dressing.

Combine sugar, 1 teaspoon salt, soy sauce, rice vinegar, and chili oil in a medium bowl. Whisk until sugar and salt dissolves. Whisk in sesame oil and vegetable oil.

Toss together spaghetti, red pepper, and carrots in a large bowl. Whisk dressing on more time then pour over spaghetti. Toss to coat. Best if served really cold, after sitting in the fridge for a couple of hours. To serve, mound up salad and sprinkle with sesame seeds and cilantro leaves. Leftovers will keep in the fridge for up to 2 days

Monday, May 12, 2014

Carrot-Mushroom Loaf


I suppose I should save this for ThrowBack Thursday but I decided it belonged with all the Meatless Monday recipes. :-) This recipe is from the original Moosewood Cookbook, a classic of vegetarian cooking. I went to college in the Finger Lakes and the Moosewood Restaurant in Ithaca, New York was already well-known for its vegetarian cuisine back in the early 1980's . It actually took me until 2011 to enjoy a meal there but it still feels like the fern bars of the 80's, where you sit among the potted plants and enjoy a lovely quiche.

The mushrooms in this loaf give it umami, that meaty savory flavor. Mushrooms are a rich natural source of glutamates (the "G" in MSG), which explains why a grilled portobello mushroom tastes surprisingly like meat. The carrots provide some texture and a bit of sweetness. The eggs, cheese, and bread crumbs bind it all together. It's delicious served mashed potatoes or some fruit chutney.

Carrot-Mushroom Loaf
(serves 6, costs $8.25)

non-stick cooking spray
½ stick butter or 4 Tablespoons oil (butter definitely tastes better in this)
1 large onion, minced
2 cloves garlic, minced
1 pound white mushrooms, chopped (a food processor does a good job)
4 ½ cups grated carrots (about 1 ¾ pounds)
5 large eggs
1 cup fresh whole wheat bread crumbs (about 1 ½ to 2 slices bread)
1 cup grated sharp cheddar cheese
1 teaspoon salt
½ teaspoon black pepper
1 teaspoon crushed dried thyme

Preheat the oven to 350°F. Spray a loaf pan (8"x3" or 9"x4") with non-stick cooking spray to grease. Set aside.

Heat the butter in a large skillet. When melted, add garlic, onion, and mushrooms. Cook until mushrooms release their liquid and most of that cooks off. Add the carrots, stir well, and remove from the heat. In a large bowl, beat the eggs. Add the carrot-mushroom mixture. Add ½ of the bread crumbs and ½ the cheese, the salt, pepper, and dried thyme. Mix to combine and pour into the loaf pan. Spread the rest of the crumbs and cheese on top and spray with non-stick cooking spray - this helps the top brown.

Cover with foil and bake for 40 minutes. Increase the oven to 400°F, remove the foil, and bake for 10 more minutes to crisp up the top. Let sit for 5 minutes before serving.

Adapted from The Moosewood Cookbook by Mollie Katzen, Ten Speed Press, 1977.

Monday, December 9, 2013

Split Pea, Barley, and Vegetable Soup

Cold, cold, cold! It's been more than a little cold here in Colorado. Soup is what you need when it's cold. This vegetarian soup is easy and adaptable. And, it makes a lot. Sure to warm your belly.

The recipe calls for turnips, but you can use rutabaga (a large yellow turnip), or daikon (an Asian turnip). You could use cauliflower. You can even use celery root, which is rather exotic for most folks. It works great here because it is a hardy vegetable that holds up to long cooking but its flavor is subtle, like a very mild celery. You need to peel it and cut away all the brown rough parts which results in a fair amount of waste. That makes celery root a somewhat expensive vegetable. But, this recipe is very inexpensive because it contains no meat, so splurge a little on the veg if you want to experiment with a new vegetable. You can also mix up the turnips/rutabagas/celery root/cauliflower in any proportion you have. I used ½ pound daikon and ½ pound celery root because that's what was in my fridge.

Split Pea, Barley, and Vegetable Soup
(serves 8, costs $6)

2 Tablespoons vegetable oil
1 medium onion, diced (or 2 medium leeks, white and light green part, thinly sliced)
2 carrots, peeled and diced
2 stalks celery, diced
¾ cup diced red pepper (about ½ a pepper, can use frozen)
3 cloves garlic, minced
1 chipotle chile in adobo, seeded and minced
1 Tablespoon ground coriander
1 Tablespoon ground cumin
10 cups water
1 cup dried split peas (yellow or green)
1 pound turnips, peeled and cut into 1" dice
½ cup pearl barley
1 Tablespoon dried oregano
1 teaspoon dried thyme
½ teaspoon ground black pepper
1 ¼ teaspoon salt
1 Tablespoon vinegar, lime or lemon juice

Heat the oil in a large soup pot over medium heat. Add the onion, carrots, celery, garlic, and chile. Sauté for 10 minutes. Add coriander and cumin. Stir to combine and cook for 1 minute. Add water, split peas, turnips, barley, oregano, thyme, and black pepper. Bring to a boil, reduce to low to maintain a simmer. Cover and cook until split peas are tender, at least 1 hour 30 minutes, or longer, if you prefer them softer. Add salt and vinegar or citrus juice. Stir  and taste. Add more salt, if needed. Freezes well.

Adapted from Lean Bean Cuisine by Jay Solomon, 1995, Prima Publishing.

Friday, November 22, 2013

Lime Rice and Salsa Beans


One more recipe from my last class. This is is really simple. You can serve it as a hearty side dish or as a meal in itself. We used the Salsa Fresca we had made during class, but you can use any salsa you have.

Lime Rice & Salsa Beans
(serves 8 as a side or 3-4 as an entree, costs $1.75)

Baked Lime Rice
1 cup rice
1 ½ cups water
juice of ½ a lime (or more if you like tart flavors)
2 Tablespoons chopped cilantro (optional)

Salsa Beans
1 15 oz. can red kidney beans, rinsed and drained
½ cup salsa
½ teaspoon salt
½ teaspoon pepper

Preheat oven to 400°F.

In an ovenproof medium saucepan, bring water to a boil. Add rice and stir. Cover and bake for 17 minutes. Remove from oven and let sit for 5 minutes. While the rice is resting, heat the beans in a small saucepan until hot. Add salsa, salt, and pepper and stir to combine. To serve, stir lime juice (and cilantro if using) into rice, and pour beans on top.


Wednesday, October 23, 2013

Vegetarian Spring Rolls


I am a huge fan of rice wrappers. They are cheap. They are easy to handle once you get the hang of it. They are light and they look so cool! I used them instead of the traditional Mu Shu Pancakes last year in a class. Huge hit. I brought them back for another class this month in the form of vegetarian spring rolls. They are filled with lettuce, mint (though you could use basil if you prefer), a carrot-cucumber salad, and baked tofu. The tofu is baked in a peanut sauce which does double-duty as the dipping sauce. Delicious!

Whole lot of wrappers - you can wrap a lot of goodies with one package
There are a few tricks to using these.
  • Use warm water and don't leave the wrapper in the water too long. When they start to get pliable, take them out and lay them flat for filling. I like to put the water in a pie pan or cake pan that is big enough to hold the wrapper without any bending.
  • Don't overfill them. They do stretch but if you have pointy things sticking out, like stems of herbs or lettuce, they will rip. 
    This is about as much as you want to fill these.
  • Don't stack them or let them touch once you have rolled them. They will stick to each other, ripping the wrapper.

Vegetarian Spring Rolls
(makes 12 spring rolls)

1 pound firm tofu, sliced into 8 slices (see Note)

Sauce
¾ cup creamy peanut butter
1 large clove garlic, minced
3 Tablespoons rice wine vinegar, natural or seasoned
3 Tablespoons Hoisin sauce
3 Tablespoons soy sauce
½ cup warm water, approximately
1 to 3 teaspoons Siracha sauce (adjust to your desired spice level)
juice of ½ lime

Carrot Salad
2 medium carrots
2 medium cucumbers
4 Tablespoons rice wine vinegar
2 Tablespoon sugar
½ teaspoon salt

12 rice spring roll wrappers
about 4 large lettuce leaves, washed and torn into pieces that will fit in the wrappers
24 large mint leaves

Preheat oven to 350°F. In a medium bowl, mix together peanut butter, garlic, rice wine vinegar, Hoisin sauce, soy sauce, and Siracha. Mix until smooth. In the beginning, the peanut butter will resist combining with the liquid ingredients, but keep at it. Add water to thin to a saucy consistency. You want it thin enough so you can dip but not so thin that it drips off the spoon. Place the tofu in a single layer in a baking dish (8"x4" or 9"x11"). Pour on about ⅓ the sauce and turn to coat the tofu. Bake for 20 minutes. Set aside to cool.

While the tofu is cooling, prep the carrot-cucumber salad. Peel and julienne (cut into thin strips) or shred the carrot. Peel, seed the cucumber. Cut them into 3" lengths and slice thinly the long way. (If you want more knife practice, you can julienne them too.) Combine the rice vinegar, sugar, and salt in a large bowl and mix until the sugar dissolves. Add the carrot and cucumber. Toss to coat. Let marinate for 15 minutes.

Slice the tofu into long, thin slices when cool enough to handle. Set everything out where you can reach it: all the ingredients, a pan with an inch of warm water for softening the rice wrappers, and a surface for rolling. Lay down a piece of lettuce, a couple of mint leaves, a little carrot salad, and a few tofu slices. Roll up like a burrito - fold in the sides, fold up the edge closest to you, then roll the whole thing up to the top.

Add the lime juice to the remaining sauce and stir. Serve with rolls.

Note: You can make this with tofu right out of the carton, but the texture is better if you freeze it first. Slice it into 8 pieces, put them on a cookie sheet in a single layer, and put it in the freezer. Freeze for an hour or longer. Thaw and blot dry before baking.

Monday, September 30, 2013

Baked Tofu with Peanut Sauce

Baked Tofu with Peanut Sauce and a side of Hot and Sour Mushroom Stir fry

This is a very quick dish or you can do some steps ahead and end up with something very different. Both are really tasty. Just different.

If you start with frozen and pressed tofu, the tofu will cook up very firm, making it excellent for putting in vegetarian spring rolls or using in stir fries. If you start with tofu that is fresh from the carton, it will be saucier - the water that you would have pressed out will combine with the peanut butter mixture and make a sauce. It's good over plain rice or noodles either way.

Baked Tofu with Peanut Sauce
(serves 4, costs $2.50)

1 carton of firm tofu, 14 to 16 oz.
3 Tablespoons smooth peanut butter
2 Tablespoons vegetable oil
2 teaspoon grated fresh ginger
1 clove garlic, minced
1 pinch of cayenne
1 Tablespoon soy sauce, regular or low-sodium

Drain the tofu and slice it into 6-8 slices, about ¾" thick. You have a few choices at this point:

Lots of time: Freeze tofu, thaw, then lay on a baking rack between paper towels over a dish to catch any drips. Cover with a baking sheet and weight down with a couple of heavy cans to press out even more moisture. Let drain for 30 minutes.

Little time but you planned ahead: Freeze the tofu and then thaw.

No time: Pat dry.

Preheat the oven to 350°F. Combine the remaining ingredients in a small bowl. Spray a baking pan with nonstick cooking spray. Pour the sauce into the pan. Place the tofu on top and turn to cover both sides with sauce. Bake for 10 minutes. Turn over tofu and bake for another 8-10 minutes until sauce is bubbly and hot.

This can also be made in the microwave, which is even faster. Make sure to use a microwaveable baking dish and cook it for 3 minutes on each side.

Note: You can slice and freeze the tofu in advance. I keep some frozen tofu in the freezer so I can make a chewy tofu dish quickly.