Showing posts with label side. Show all posts

Monday, July 14, 2014

Carrots and Turnips with Marsala


This recipe gives me an opportunity to introduce a few interesting ingredients:
  • Marsala wine - a fortified wine from Sicily. It has a wonderful nutty flavor. It's fairly inexpensive and because it is fortified with brandy (and sometimes sugar), it lasts forever. I used a dry Marsala, which is an aperitif, but sweet Marsala is also made and served as a dessert wine. Marsala is the primary flavoring in Zabaglione, a silky, frothy egg custard dessert, and one of the great Italian sweets.
  • Walnut oil - full of delicious walnut flavor, it can be used for cooking, as a salad oil, or as a finishing oil, like a drizzle of extra-virgin olive oil. And like extra-virgin olive oil or butter, it can handle medium-high heat cooking. A great source of healthy fats, so I like it to use it instead of butter in many recipes where the flavor of olive oil is too savory. Walnut oil is expensive, about twice as expensive as butter, which isn't exactly cheap either. But, if you can fit a bottle in your budget, and use it sparingly, it packs a lot of flavor per penny. 
  • Turnips - Not the most popular vegetable in the garden. They have an earthy flavor which is most pronounced in bigger turnips like rutabagas. I prefer the smaller purple topped turnips that show up in the Boulder Farmers' Market in early summer. From a good family, the Brassicas, which includes broccoli, cauliflower, kale, and cabbages.
We're going to put all these together with some carrots - their sweetness balances the earthiness of the turnips - to make a delicious and unusual vegetable side dish.

Carrots and Turnips with Marsala
(makes 4-6 servings)

4 medium carrots
12 oz. purple-topped turnips
2 Tablespoons walnut oil
¼ teaspoon salt
¼ cup dry Marsala
1 Tablespoon chopped fresh parsley (about 4 sprigs) or more
¼ teaspoon black pepper

Peel the carrots and turnips. Cut the carrots into thick sticks about 3" long. Cut the turnips in half and then slice into half-moons. Heat the oil in a large skillet with a cover over medium heat. Add the carrots and turnips and toss to coat in oil. Sprinkle with the salt. Cook for 5 minutes, stirring occasionally. Add the Marsala and cover the pan. Cook for another 5 minutes until the wine has evaporated and the vegetables are tender. Sprinkle with parsley and black pepper. Serve hot.

Adapted from 1000 Italian Recipes by Michele Scicolone, Wiley Publishing, Inc., 2004.

Tuesday, June 24, 2014

Sesame Spinach


Now that we have pre-washed spinach in most every supermarket, spinach is a quick and easy vegetable side dish. This dish is similar to many Asian dishes, lots of garlic, soy, and that powerhouse of flavor, Asian sesame oil. You can eat it cold too. Add a pound of stir-fried tofu cubes, serve over rice, and you have a super-quick vegetarian dinner for 4.

Sesame Spinach
(serves 4)

3 cloves garlic, minced
1 Tablespoon soy sauce
1 teaspoon sugar
1 Tablespoon vegetable oil
1 pound pre-washed spinach
½ Tablespoon sesame oil
¼ teaspoon salt
1 ½ Tablespoons sesame seeds (optional)

Combine the soy sauce and sugar in a small bowl and mix to dissolve the sugar. Heat the oil in a large skillet or wok until smoking hot. Add garlic, stir for 10 seconds, then add the spinach and toss. Continue to toss until spinach is wilted. Add soy-sugar mixture and toss again. Remove from heat. Add sesame oil, salt, and sesame seeds (if using) and toss. Serve hot, room temperature, or cold as a salad.

Tuesday, May 13, 2014

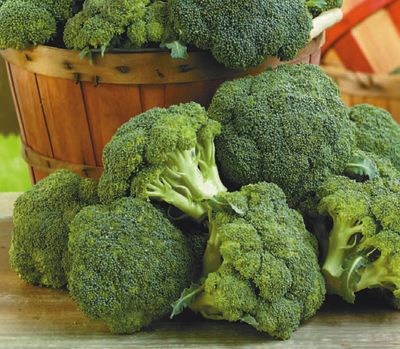
The Inner Life of Broccoli


Last summer, I read this article about a Cornell plant scientist who is trying to breed a better broccoli. Most broccoli is grown in moist, cool, foggy places, like coastal California, and doesn't tolerate warm temperatures, particularly at night. As broccoli is near the top of my favorite veggie list, I was keenly interested in his quest to breed a better broccoli, one that reaches the market sweet and crisp. Though he has successfully bred an improved broccoli, it may be a while before it reaches a market near you. Until then, is there a take-away from this work? Sure is - cook your broccoli soon after you buy it! Like that same day. No, it will not taste like fresh picked but every day it sits in your crisper is another day towards increased funkiness, something most people find off-putting about broccoli. You can steam it, chill it down quickly in ice water, drain, and refrigerate it until you need it. Heat it up in the microwave or quickly sauté it. Steaming is better at preserving nutrients than boiling, so I don't usually boil green vegetables.

Remember the stems are tasty too (in fact, they are often sweeter than the florets), but the lower stem has a thick fibrous layer that should be peeled off. Start from the bottom and pull upwards towards the florets on the thick outer layer. It will peel off in pieces. You don't need to peel all the way up; just the lower part is fibrous.

Also, learn to pick the freshest bunches: not limp and rubbery, and with tight green heads and no yellowing.

Here's a recipe, originally for asparagus, that works just as well on broccoli:

Broccoli with Goat Cheese Sauce
(serves 4, costs $2.75)

1 pound broccoli, trimmed, and cut into florets and stem pieces sliced ¼" thick
1 oz. creamy goat cheese with herbs
1 Tablespoon mayonnaise
1 teaspoon fresh lemon juice
¼ teaspoon black pepper
1 ½ Tablespoon hot water
salt

Combine goat cheese, mayonnaise, lemon juice, black pepper, and hot water in a medium bowl. Whisk until the sauce is smooth.

Steam the broccoli for about 5 minutes until just tender. Dress with sauce and sprinkle lightly with salt. Serve immediately.

Adapted from Nutrition Action.com, Asparagus with Goat Cheese and Dill Sauce


Friday, May 2, 2014

Carrots with Tequila


I don't drink much tequila but I keep it on hand because it is an excellent cooking liquid. It imparts this sweet, herbal flavor that goes so well with many ingredients, here carrots. It's also the cooking liquid in my recent mahi-mahi roasted with tomatoes. You could use wine but for Mexican cuisine, tequila just seems right. Unlike wine, it contains enough alcohol to flame. If you aren't comfortable doing this (it is quite dramatic), it's not absolutely necessary. The alcohol will evaporate, though not all of it cooks off, even if you flame it.

Some important safety tips if you want to try your hand at flaming:
  • Never pour the liquor from the bottle into the pan. If the bottle slips out of your hand, you are going to have serious trouble on your hands. Measure what you need into a measuring cup and pour from there.
  • Stand back as far as you can when you ignite the alcohol. The flames go pretty high and you don't want to be near them when that happens. And if you have anything flammable hanging over your stove, remove it before flaming.
  • It's safest to remove the pan from the heat, and use a long match to light the alcohol. If you have a gas stove, you can add the alcohol, then carefully tip the edge of the pan towards the flame to light the alcohol. It should ignite quickly.
  • You should always have a fire extinguisher in your kitchen in case of an emergency.
Carrots with Tequila
(serves 4)

1 pound carrots
2 Tablespoons butter
2 teaspoons minced fresh dill
salt and black pepper
¼ cup tequila

Cut the carrots into ¼" coins. Melt the butter over medium heat in a medium skillet with a cover. Add the carrots and toss to coat in butter. Cover the pan and cook until just tender, about 15-20 minutes. Stir once during cooking. If the carrots start to brown, turn down the heat. Add the dill, salt, and pepper. Mix seasonings in and increase the heat to high. Add the tequila and set tequila on fire. Shake pan until the flames die out, then serve.

If you don't want to set your carrots afire, only cook carrots for 10-15 minutes until still crunchy, and keep the pan heat around medium when you add the tequila. Cook the carrots in the tequila for 5 minutes to cook off some of the alcohol and finish cooking the carrots.

Monday, April 28, 2014

Simple Steamed Broccoli with Lemon


It's common to dress cooked green vegetables with lemon juice. I have a real problem with this. First, lemon juice is powerful stuff and can overpower everything and make the flavor too tart. That probably explains the generous dousing with butter or oil that follows the lemon juice. Another problem with lemon juice is its acidity. You know that dull green color that comes from overcooking green vegetables? That happens when you put an acid on green vegetables too. Ick. If you dress a big bunch of broccoli with lemon juice and don't finish it, next time you look at it, it's going to be dull green. And mushy too because the acid softens up the fiber. Double ick.

I do like the bright lemon flavor on green vegetables, however. Here's my solution: use lemon zest. You can use just lemon zest and oil. Or you can mix the lemon zest with some fresh herbs like parsley or thyme. Both of those herbs are bright, enhancing the lemon even more. If you can find lemon thyme, even more lemon! It's super easy. You can use frozen herbs instead of fresh. A light squeeze of lemon juice is nice but only for broccoli you will eat right away.

This recipe is a variation on our Simple Steamed Broccoli. At the very end, it's tossed with a bit of lemon zest. Instant lemony flavor without the overwhelming tart taste and it holds up in the fridge great.

Simple Steamed Broccoli with Lemon Zest
(serves 4-6, costs $3.13)

2 cloves of garlic, sliced thinly
1 lb. broccoli, broken into small florets and stems peeled and cut into 1/4" slices
zest of 1 lemon
1 Tablespoon fresh minced parsley or 1 teaspoon thyme leaves (optional)
2 tablespoons olive oil
¼ tsp salt, or more to taste
lemon wedges, optional

Heat 1 teaspoon olive oil in a medium saucepan or skillet with a cover over medium heat.

Add garlic and saute until fragrant but not browned. Don't burn it - it turns bitter.

Add broccoli and toss to cover with oil. Add 1 Tablespoon water,  which should immediately create a lot of steam. Cover and steam broccoli for 5-6 minutes, until crisp-tender. Try a piece after 4 minutes if you like your broccoli crisp. If it's not cooked enough, cook for another minute or two.

Sprinkle with lemon zest, remaining oil, salt, and herbs, if using. Mix to combine and serve with lemon wedges, if desired. Can be refrigerated. Excellent served cold but you may need more salt. Cold temperatures dull flavors.

Saturday, March 29, 2014

Roasted Brussels Sprouts with Bacon


It's getting to the tail end of Brussels sprouts season. They are a cool weather crop so now's the time to get some before they disappear for the summer. I know, you hate Brussels sprouts. So many people have only had them boiled to death, and I have to say, they are horrendous little cabbages when overcooked. But, roasting brings out their sweetness and they maintain their crisp texture. There's just a little bit of bacon in this, enough to impart the smokey flavor but not much actual bacon. My favorite bacon is Farmland brand; it's not as salty as many of the major brands, but still very tasty.

Roasted Brussels Sprouts with Bacon
(serves 6)

1 ½ pounds Brussels sprouts, rinsed and cut in half
2 slices thick sliced bacon (or 3 slices regular thickness), diced
2 large shallots, peeled and cut into quarters
2 Tablespoons oil
salt and pepper
1 ½ Tablespoon fruity vinegar like Sherry, red wine, or balsamic

Preheat oven to 375°F. Place the Brussels sprouts on a rimmed cookie sheet large enough to hold them all in one layer. Distribute the bacon and shallots. Drizzle on oil, and sprinkle with salt and pepper. Toss it all around a bit. Roast for 10 minutes. With a wide pancake spatula, mix it all around. Roast for another 15 minutes. Remove from the oven and sprinkle with the vinegar. Serve immediately. Leftovers can be refrigerated and reheated but they will smell more cabbage-y when reheated and the texture will be softer.


Wednesday, February 12, 2014

Wilted Spinach

Looks like a lot of spinach, but really only 3 servings once it's cooked

This is the last recipe from my class last week. I hesitate to call it a recipe because it's so simple. The secret is to only wilt the spinach. It will continue to cook after you remove it from the skillet. As spinach is perfectly tasty raw in salads, you barely need to cook it. Which makes it a great vegetable for any night because it's done in a flash.

Spinach cooks down a lot. You will need 4 to 5 oz. per serving, which seems like a ridiculous amount when you see it raw, but it does the magical disappearing act when cooked.

This recipe uses a simple flavoring technique - garlic cooked in oil. Watch the garlic carefully while cooking. You want it toasted brown but not burned. Burned garlic is horribly bitter. If you burn it, you'll need to start over with new oil and garlic. We remove the garlic before tossing in the spinach. You can use the cooked garlic as garnish or discard them. 

The recipe is for 1 serving. It can be doubled, tripled, whatever you need at the time, though if you cook more than a pound of spinach, you are going to need a very large skillet! You can dump leftover cooked spinach in soup, tomato sauce, or stew but I recommend you cook only what you need at that moment. It only takes about 3 minutes. It's wonderful as a bed for our Salmon with a Potato-Scallion Crust.

Wilted Spinach
(serves 1, costs 75¢ )

1 teaspoon vegetable or olive oil
1 small clove of garlic, cut in half
4 oz. raw spinach
salt

Heat up a medium skillet over medium-high heat. Add the oil and garlic. Cook the garlic until a toasty brown all over but be careful not to burn it. It will only take a minute. Remove the garlic (reserve for garnish if you like garlic a lot or discard if you don't). Add in the spinach and toss in oil. Cook for about 1 minute until some of it starts to wilt. Season lightly with salt. Serve immediately.

Wednesday, December 18, 2013

Cauliflower with Orange Sauce

By http://www.flickr.com/photos/calliope (http://www.flickr.com/photos/calliope/54833239) [CC-BY-SA-2.0 (http://creativecommons.org/licenses/by-sa/2.0) or CC-BY-2.0 (http://creativecommons.org/licenses/by/2.0)], via Wikimedia Commons
Cauliflower is one of my favorite vegetables. Unlike green vegetables, it's nearly impossible to overcook. You have to intentionally cook it to death to even make it mashable, which has become a popular preparation of late. That bullet-proof cook-ability  makes it the perfect vegetable for new cooks. You overcook broccoli and it's gross. You overcook cauliflower? It still tastes just fine.

This recipe is a riff on a richer orange sauce. That sauce contains lots of butter and it's thickened with a roux*, which explains all that butter. This is lighter, which is fine for most of us. We don't need quite that much butter - there is still some for flavor but I used a cornstarch slurry for thickening. Chinese stir fries are thickened with cornstarch, and it's a great technique for thickening sauces without a lot of fat (in fact, you could use no fat).

Though there are folks who believe that we should all eat our vegetables unadorned by fat, I find this is rather spartan. My philosophy is a little bit of tasty fat, like butter, goes a long way to making our vegetables more tasty. If that small bit of richness gets you to your vegetables, I'm all for it!

Cauliflower prices vary a bit. This week, I can get a pound for 88¢. Last week, I couldn't find it for less than $1.59/pound. The recipe cost reflects the higher price.

Cauliflower with Orange Sauce
(serves 4-6, costs $3.50)

1 head of cauliflower (about 2 pounds), cored and cut into florets
juice of 1 orange (should yield about ¼ cup juice)
1 teaspoon vegetable oil
¼ cup minced onion
2 cloves garlic, minced
¼ teaspoon ground coriander
1 teaspoon cornstarch dissolved in 1 Tablespoon cold water
½ Tablespoon butter
salt and black pepper

Bring a large pot of salted water to a boil. Cook the cauliflower for 8-10 minutes, until tender.

Meanwhile, heat the vegetable oil over medium heat. Add the onion and cook until softened. Add the garlic and coriander. Cook for another minute. Drain the cauliflower and add to the pan. Raise the heat to medium high and add the orange juice. When the juice comes to a boil, add the cornstarch+water. Boil until the sauce thickens and coats the cauliflower. Add butter, season with salt and pepper, and serve.

*Roux: flour cooked in a fat, often butter. Used as a thickener in sauces and soups like chowders and gumbos.

Friday, November 22, 2013

Lime Rice and Salsa Beans


One more recipe from my last class. This is is really simple. You can serve it as a hearty side dish or as a meal in itself. We used the Salsa Fresca we had made during class, but you can use any salsa you have.

Lime Rice & Salsa Beans
(serves 8 as a side or 3-4 as an entree, costs $1.75)

Baked Lime Rice
1 cup rice
1 ½ cups water
juice of ½ a lime (or more if you like tart flavors)
2 Tablespoons chopped cilantro (optional)

Salsa Beans
1 15 oz. can red kidney beans, rinsed and drained
½ cup salsa
½ teaspoon salt
½ teaspoon pepper

Preheat oven to 400°F.

In an ovenproof medium saucepan, bring water to a boil. Add rice and stir. Cover and bake for 17 minutes. Remove from oven and let sit for 5 minutes. While the rice is resting, heat the beans in a small saucepan until hot. Add salsa, salt, and pepper and stir to combine. To serve, stir lime juice (and cilantro if using) into rice, and pour beans on top.


Wednesday, March 13, 2013

It's cabbage time...


But, only for a very short time. Every year just before St. Patrick's Day, cabbage goes on sale for unbelievably low prices. The lowest price I've seen is 19¢, for organic cabbage no less!

Like Brussels sprouts, cabbage gets a bad rap. If you cook it to death, it can exude eau du stinky vegetable. Fortunately, there are lots and lots of ways to cook cabbage that are  delicious and not stinky.

This hot salad recipe - really a stir fry - is not Irish. Unfortunately, the Irish have a habit of cooking their cabbage until dead, dead, dead. This recipe comes from Southeast Asia. It's fresh. It's light. It's very spicy (you can reduce the chile if you don't like spicy). Like Southeast Asia, about as far away from Ireland as you can get.

[Just for the record, I'll be eating corned beef and long-cooked cabbage this weekend because I like cabbage that much.]

Hot and Sour Cabbage
(serves 6, costs $1.10)

1 pound of cabbage, (about ¼ of a medium head), shredded
2 Tablespoons vegetable oil
½ - 1 teaspoon Siracha sauce or Sambal Oelek (fresh ground chile paste)
1 Tablespoon brown sugar
½ teaspoon salt
1 Tablespoon soy sauce
2 Tablespoons rice vinegar
½ teaspoon sesame oil

Heat a large skillet or wok over high heat. Add oil and swirl around pan. Add chile sauce. Careful! It will spit and spatter. Immediately, add cabbage. Stir fry for about 1 minute. Add brown sugar and salt. Stir fry for another minute. Add soy sauce, rice vinegar, and sesame oil, toss to mix, and serve.

Adapted from Healthy Salads From Southeast Asia by Vatcharin Bhumichitr


Sunday, January 27, 2013

Honey Glazed Carrots


Carrots are one of the easiest vegetables to prepare. They are very tolerant of overcooking. Or undercooking - we eat lots of raw carrots in my house. You need to figure out how cooked you like your carrots - very crunchy, a little crunchy, tender, or even soft. All these points on the carrot cooking continuum are just fine.

Carrots are also cheap year round, making them an excellent go-to vegetable. They are pleasantly sweet, all by themselves, which makes them palatable to lots of folks. They aren't as challenging as, say, collard greens or even broccoli. But, still very nutritious.

This is a simplification of a classic French dish, carrots glazed with butter and sugar. Though butter is more expensive, it is mighty tasty. We use honey here, but you could substitute an equal amount of agave nectar. Even maple syrup, though that is pretty decadent. :-)

This isn't terribly sweet. There is just enough sugar to enhance the natural sweetness of the carrots. Really - this isn't dessert, it's a vegetable!

Honey Glazed Carrots
(serves 4-6, costs $1.00 made with butter, 85¢ if made with oil)

1 pound of carrots, sliced thinly or julienned or cut into sticks (see Note)
1 ½ Tablespoons butter or vegetable oil
1 ½ Tablespoons honey
about ½ teaspoon salt
chopped parsley (optional)

Fill a medium saucepan half full with water. Bring to a boil and add the carrots. Cook until they are done to your liking. For tender carrots, it takes 8-12 minutes depending on how thick they are sliced. Julienned carrots will take under 5 minutes. Drain the carrots and return to the saucepan over low heat. Add the butter, honey and salt. Toss to coat. The carrots are ready when the butter has all melted and carrots are all coated. Add chopped parsley for color, if you like.

Flat side down, to keep the carrot from rolling around
Note: Slicing or julienning carrots is great knife skills practice. If the carrot rolls around when you try to cut it, slice off a thin slice from one side of the carrot. That will prevent the carrot from rolling around as much. Julienning - cutting something into skinny sticks - is done by slicing the carrot the long way, stacking up the slices, and cutting the slices into thin sticks. It's easier to do if you cut the slices into 3-4" lengths before cutting into sticks.

Sunday, January 20, 2013

Cauliflower with Orange Flavor


This recipe is inspired by a Spanish salad recipe. It can still be served as a salad if you chill it after cooking. But, the important difference is all the ingredients are cooked. In the original recipe, the cauliflower is blanched but the rest of the ingredients are added raw. Some folks like raw onions, many don't. So, here's a variation on the raw salad that is made even better by sautéing the onions. The original version also has segments of orange; this version gets the punch of orange flavor from orange zest.

Extra-virgin olive oil is fairly expensive. To keep the cost low, we use cheaper vegetable oil for the sautĂ©ing and finish it with a drizzle of the more flavorful but more expensive extra-virgin olive oil. You can leave off the drizzle; it's still very tasty.

The average non-sale cost of cauliflower is $1.49 but this time of year, you can find it on sale a lot. Look for those produce sales! Eating what is on sale this week can really save you a bunch of money and stretch your budget for delicious and nutritious fruits and vegetables.

Cauliflower with Orange Flavor
(serves 4-6, costs $2.80)

1 small head of cauliflower (about 1 pound), cut into florets
2 Tablespoons vegetable oil
2 cloves garlic, minced
½ of a red onion, minced
1 small can (3.8 oz.) sliced olives or ⅓ cup chopped kalamata olives
2 Tablespoons water
zest of 1 orange
1 Tablespoon extra-virgin olive oil
¼ teaspoon salt
¼ teaspoon black pepper

Heat the 2 Tablespoons vegetable oil in a large skillet over medium heat. Add onion and garlic. SautĂ© for a minute or two until the onion becomes translucent. Add cauliflower,  olives, and 2 Tablespoons water. Cook, covered, until cauliflower is tender, about 5 minutes. Remove from heat, add orange zest, extra-virgin olive oil, salt, and pepper. Stir to combine. Serve hot, warm, or chilled. If you serve it chilled, you may need to add a bit more salt.

This is a vegetable dish that improves with reheating.

Wednesday, November 14, 2012

Moroccan Carrot Salad

For the last two classes, we made a simple green salad with a vinaigrette. This time, we switched it up a little. No greens. Carrots instead. Carrots are inexpensive, even in the winter, when lettuce often gets a lot pricier. Carrots are sturdy so this is a salad that can sit in the fridge for a few days. Don't try that with a dressed green salad!

This is a full-flavored dressing. You can leave out the red pepper flakes and it will still pack plenty of flavor. If you want it spicy, use the full ¼ teaspoon. It will be quite spicy! I like it with just a pinch of red pepper so that it doesn't overpower the other spices.

Moroccan Carrot Salad
(serves 4-6, cost is $2.00)

1 pound carrots, peeled and cut into ¼ slices
1 teaspoon salt
1 teaspoon ground cumin
1 teaspoon sweet paprika
¼ teaspoon black pepper
a pinch to ¼ teaspoon crushed red pepper flakes (optional)
2 Tablespoons olive oil
1 clove garlic, minced
juice of 1 lemon
1-2 Tablespoons chopped parsley

Bring about 3 cups of water to a boil in a medium saucepan. Add the salt and carrots. Cook over medium heat until just tender, about 5 minutes. Do not overcook or they will fall apart when tossed with the dressing. Drain and cool.

Mix the remaining ingredients in a medium bowl. Add cooled carrots and toss.

This salad improves as the carrots sit in the dressing.

For a super quick variation, use a 1 pound bag of shredded carrots. Don't cook them. Just dress them raw. Different texture but the same bold flavor.

Saturday, October 20, 2012

Green Beans with Pineapple


Does that sound like a strange combination? It works rather well in this very simple Asian side dish. It's an unusual way to get your fruit!

You can make this with fresh green beans (see our post on cooking fresh green beans) but it works nearly as well with frozen green beans. Frozen green beans aren't quite as good as fresh ones, but what they lack in texture and sweetness, they make up for in convenience. No cleaning, no cutting.

You can cook frozen beans in the microwave or on the stove-top. Takes under 15 minutes either way. To cook in the microwave, put beans in a 2 quart microwavable dish with a cover. Add ¼ cup water. Cover and microwave on high for 4 minutes, give them a stir, and cook for another 4 minutes. Let stand, covered, for a couple of minutes. To cook on the stove-top, bring ¼ cup water to a boil in a 2 quart saucepan. Add beans, cover, and cook for 8 minutes. In either case, drain them well before proceeding with the recipe.

Nutritionally speaking, they are equivalent. Frozen beans are quite inexpensive. Fresh beans in season are close, but the frozen ones are consistently cheaper.

How about canned green beans? Their texture is mushy and their flavor is over-cooked. Stick to fresh or frozen.

Green Beans with Pineapple
(serves 4, costs $2)

12 ounces cooked green beans, either fresh or frozen, well-drained
2 Tablespoons butter
1 clove garlic, minced (optional)
1 8-ounce can diced or crushed pineapple, drained
1 Tablespoon soy sauce
A pinch of salt

Melt butter in a skillet over medium heat. Add garlic, if using, and saute for about a minute. Add green beans and stir to cover with butter. Add pineapple and soy sauce. Cook another minute to heat up the Add a pinch of salt if you think it isn't salty enough.

Tuesday, September 25, 2012

Simple Stewed Zucchini


Here's another simple and quick vegetable recipe: stewed zucchini. Zucchini is quite versatile. It is quite good quickly sauteed but it's also delicious stewed. That is, cooked in a flavorful liquid. It still cooks fairly quickly. Zucchini is a bit of a chameleon when it comes to flavor. It doesn't have a strong flavor and picks up other flavors, like onions or garlic, readily. One of the nice things about stewed zucchini is that it's just as good reheated, unlike barely sauteed zucchini. You can't really overcook it because it's already cooked until soft.

If you are a novice cook, you may have seen the term "simmer" before  but you may wonder exactly what that is. Simmer is used to describe heating liquids to not quite boiling. The surface of the liquid quietly moves with some small bubbles now and then - no big bubbles and splashing. Simmering is a gentle cooking method used for long cooking, like for spaghetti sauce, or cooking delicate things like fish, or in this recipe, zucchini.

Stewed Zucchini
(serves 4-6, costs $2.50)

2 Tablespoons olive oil
1 medium onion, chopped
1 clove of garlic, minced
4 to 5 medium zucchini, about 1 ½ pounds, sliced about ¼" thick (see Note)
⅔ cup chicken or vegetable stock
¼ teaspoon dried oregano, crushed in your palm
¼ - ½ teaspoon salt (depends on the saltiness of your stock)
¼ teaspoon black pepper
4 sprigs fresh parsley, chopped (optional)

Heat oil in a skillet over medium heat. Add onion and saute until edges of onions start to brown. Add garlic and cook for another minute. Add zucchini to onions. Cook for another 5 minutes, stirring once or twice so they cook evenly. They may start to brown (it depends a lot on how much moisture there is in the zucchini), which is OK. Add the stock, crushed oregano, salt and pepper. Simmer gently for about 10 minutes, uncovered, until most of the stock has evaporated. Sprinkle with parsley, if using, and serve.

Note: Any summer squash, such as yellow squash, can be used. Or mix yellow and green. You will find it easier to slice the zucchini if you cut it in ½ lengthwise, put the flat side down, then slice it.

Tuesday, April 24, 2012

Cauliflower in Tomato Sauce


Here's a fairly quick and delicious cauliflower dish. It's quite versatile as well. You can eat it as a side dish. You can use it as a sauce for pasta (add some cheese or chickpeas to make it into a hearty main dish pasta). You can even use it as a sauce on simple grilled meats and fish. One of the nice things about cauliflower is it's very tolerant when it comes to cooking time. You can cook it a fairly long time, relative to many green vegetables, and it still tastes great. In fact, you can cook it to death and it makes a delicious puree. Like broccoli, it is a cruciferous vegetable, meaning it's full of great nutrients.

Cauliflower in Tomato Sauce
(serves 6; total cost is $5.20)

1 ½ pounds cauliflower, about 1 medium head
1 onion, chopped
2 cloves garlic, minced
2 Tablespoons olive oil
1-2 pinches crushed red pepper
20 oz. tomatoes, chopped (Roma or cherry) or 1 28 oz. can peeled tomatoes
½ cup water (omit if using canned tomatoes)
2 Tablespoons minced fresh basil or parsley
¾ teaspoon kosher salt

Cut the cauliflower in small florets. Chop the core and stems into small chunks.

Heat the oil over medium heat in a large saute pan with a cover. Add the onion, garlic, and crushed red pepper. Saute until onion is starting to brown on the edges, 5 to 8 minutes. Add the tomatoes (and water if using fresh tomatoes) and reduce heat to maintain a simmer for 10 minutes. Add the cauliflower, fresh herbs, and salt. Stir, cover, and cook for 15 minutes, stirring occasionally. Uncover and cook for another 5 minutes.

Wednesday, April 11, 2012

Coconut-Ginger Rice


We love Thai food (in fact, our next class tonight is on Thai cooking) but one of the frustrations of making Thai curries is that ½ can of coconut milk that is often left over. As you can see in the photo, your typical can of coconut milk contains 14 oz. which is 2 ½ cups. (Someone out there is saying "Isn't 14 oz. just shy of 2 cups?" No, it weighs 14 oz. but it is 2 ½ cups by volume.* And yes, the can says 14 fl. oz. as my dear friend Deb has pointed out to me, but it's a lie. If you do the math, from the weight in grams per serving, it works out to 14 oz. by weight.)

School of Eating Good is here to help you with that pesky leftover coconut milk. I helped create a similar recipe for a Caribbean restaurant. It goes great with grilled fish or meat. It's pretty addictive stuff.

This recipe doesn't have a definitive amount of coconut milk. It's meant to use up what you have left over. So, if you use ½ a can, use the rest (about 1 ¼ cups) along with 1 ¾ cups of water to get to 3 cups liquid. We suggest you use at least 1 cup of coconut milk and as much as a whole can. We wouldn't want to create more leftovers trying to use up existing leftovers!

Coconut-Ginger Rice
(serves 6; total cost is  $3.10 if using all of a 14 oz. can of coconut milk)

1 tablespoon butter
1 tablespoon grated or finely minced fresh ginger
2 cloves of garlic, minced
½ small onion, minced
1 ½ cups long-grain rice (jasmine rice is exceptionally good though more expensive)
1 cup or more coconut milk
enough water when mixed with the coconut milk to make 3 cups of liquid
1 teaspoon kosher salt

Melt the butter in a medium saucepan over medium heat. Add the ginger, garlic, and onion. Saute for a few minutes until onion is translucent. Add the rice and stir well.

Add the coconut milk, water, and salt. Stir well. Bring to a boil. Stir again, cover, and reduce the heat to a simmer.

Cook for 20-25 minutes until liquid is absorbed. Remove from heat and let sit for 5 minutes.

* Three common ingredients have the same volume as weight: butter, milk, and eggs. That is, 8 oz. by volume of milk, butter, or eggs equals 8 oz. of these by weight. You can remember this with the saying: "A pint's a pound the world around for butter, milk, and eggs." It's true of water too. It is definitely not true for coconut milk.

Tuesday, January 31, 2012

Best Cornbread Ever

We've been posting a lot of cold weather soup recipes lately and I thought I'd include one for cornbread to eat with those soups. This is a sweet cornbread that also goes really well with chili or a salad (try it with the curried chicken salad we posted a while ago). Or, cut a piece in half, toast and butter it and eat it for breakfast.  It's based on a recipe from "A World of Breads" by Dolores Casella. You do need a 9-inch square pan, but you'll use that for lots of other things, so it's well worth getting.

Sweet Cornbread (total price $4.35)

3/4 cup butter, at room temperature
3/4 cup sugar
3 large eggs, at room temperature
2 cups flour
1 1/2 cups coarsely ground cornmeal
3 teaspoons baking powder
1/2 teaspoon salt
2 cups milk, at room temperature

Cream butter and sugar until fluffy with an electric hand mixer. Add the eggs and beat until blended. Stir in the cornmeal. Sift the flour, baking powder, and salt. Stir the sifted dry ingredients into the creamed mixture alternately with the milk. To prepare the pan, either butter the entire 9-inch square pan or take a 9-inch wide piece of parchment paper or non-stick aluminum foil and place it in the pan with the ends coming over the sides (you'll use these for handles to remove the bread). Butter the 2 sides not covered with the paper/foil. Pour the batter into the prepared pan. Bake at 375 degrees for 40 to 50 minutes, until the cornbread is browned and tests done with a toothpick. Cut into squares.

This bread freezes well.  I usually wrap 1 or 2 squares in plastic wrap and then put all the wrapped pieces in a freezer bag.  That way, I can easily take it out one serving at a time.  Microwave on high for 20-30 seconds to defrost each serving.

Wednesday, January 18, 2012

Roasted Cauliflower with Lemon and Mustard

We gave you the basics on roasting vegetables last week. Here's a delicious version of roasted cauliflower that is fancied up a bit. Rather than oil, it uses butter as the fat, which adds tons of flavor. Mustard and lemon add even more. The roasting temperature is lower because the butter will burn at high temperatures. Totally delicious.

Roasted Cauliflower with Mustard and Lemon
(serves 6; total cost is $4.20)

2 lbs cauliflower (1 medium head)
6 tbl butter
2 tbl fresh lemon juice
2 tbl whole grain mustard, such as Dijon
1 ½ tsp fresh lemon zest, minced (see Note)
½ tsp salt
¼ tsp black pepper
2 tbl chopped parsley

Preheat oven to 375° F.

Remove leaves and the tough core from the cauliflower. Slice into ¼" pieces. Place in a large bowl.

Melt butter over low heat. Add lemon juice, mustard, and lemon zest. Whisk to combine. Pour over cauliflower and toss. Pour onto a large rimmed cookie sheet, spreading the cauliflower into 1 layer. Make sure to scrape all the butter out of the bowl. That's the good stuff; don't waste it! Sprinkle cauliflower with salt and pepper.

Put in the oven for 15 minutes. Stir around, then return to the oven for another 20 minutes until cauliflower is tender.

Sprinkle with chopped parsley. Serve hot or at room temperature.

Note: The easiest way to zest a lemon is with a microplane. If you don't have one, you can use a vegetable peeler to take off just the yellow part of the peel. The white part (the pith) is extremely bitter, so don't peel too deep. The top yellow layer is full of tasty lemon oil and that's what you want.